File Uploading
This guide will show you how to set up file uploading in your SaaS app.
There are two options we recommend:
- Using AWS S3 with presigned URLS for secure file storage.
- Using Multer middleware to upload files to your own server.
We recommend using AWS S3 as it’s a scalable, secure option, that can handle a large amount of storage.
If you’re just looking to upload small files and don’t expect your app to grow to a large scale, you can use Multer to upload files to your app’s server.
Using AWS S3
Section titled “Using AWS S3”How presigned URLs work
Section titled “How presigned URLs work”Presigned URLs are URLs that have been signed with your AWS credentials and can be used to upload files to your S3 bucket. They are time-limited and can be generated on the server and sent to the client to upload files directly to S3.
The process of generating a presigned URL is as follows:
- The client sends a request to the server to upload a file.
- The server generates a presigned URL using its AWS credentials.
- The server sends the presigned URL to the client.
- The client uses the presigned URL to upload the file directly to S3 before the URL expires.
We use this method to upload files to S3 because it is more secure than uploading files directly from the client to S3. It also allows us to keep our AWS credentials private and not expose them to the client.
To use presigned URLs, we’ll need to set up an S3 bucket and get our AWS credentials.
Create an AWS Account
Section titled “Create an AWS Account”Before you begin, you’ll need to create an AWS account. AWS accounts are free to create and are split up into:
- Root account.
- IAM users.
You’ll need to first create a root account, and then an IAM user for your SaaS app before you can start uploading files to S3.
To do so, follow the steps in this external guide: Creating IAM users and S3 buckets in AWS.
Create an AWS S3 Bucket
Section titled “Create an AWS S3 Bucket”Once you are logged in with your IAM user, you’ll need to create an S3 bucket to store your files:
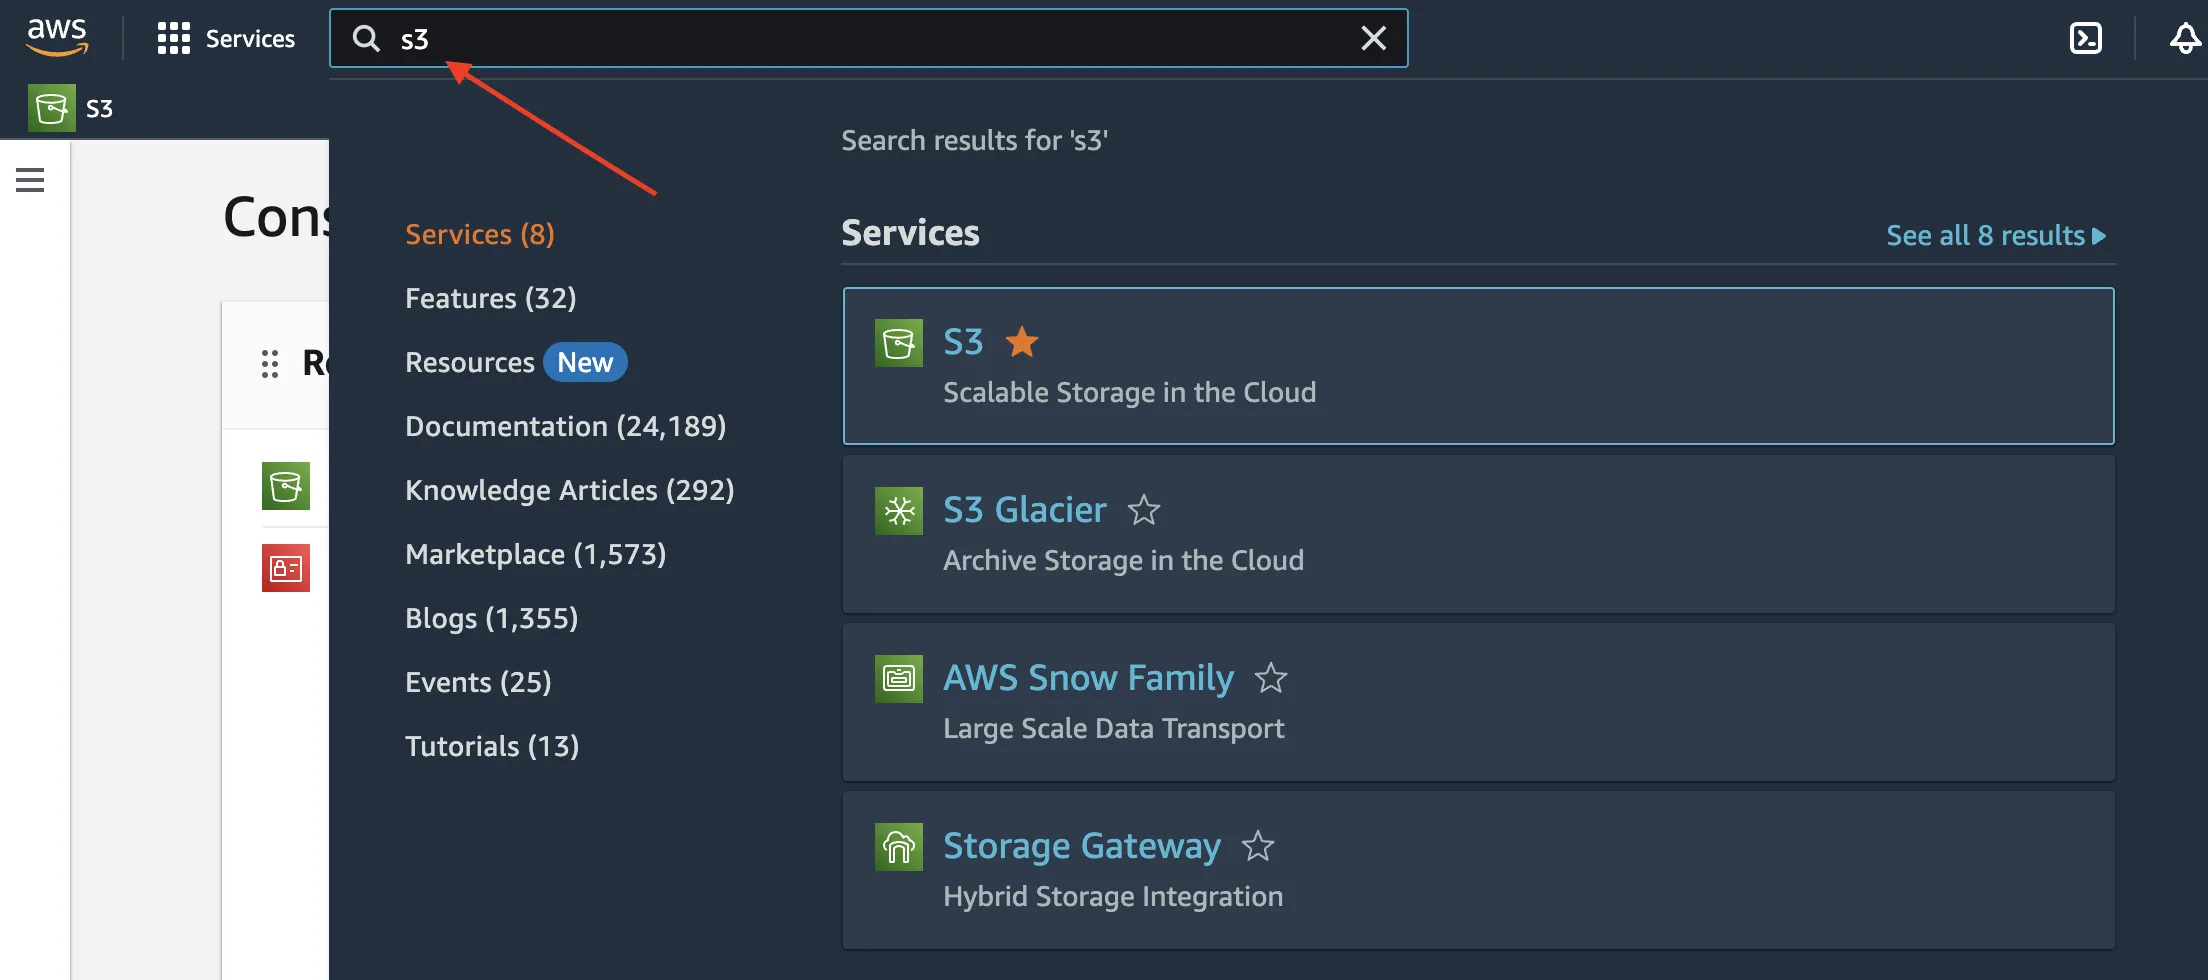
- Navigate to the S3 service in the AWS console.
- Click on the
Create bucketbutton.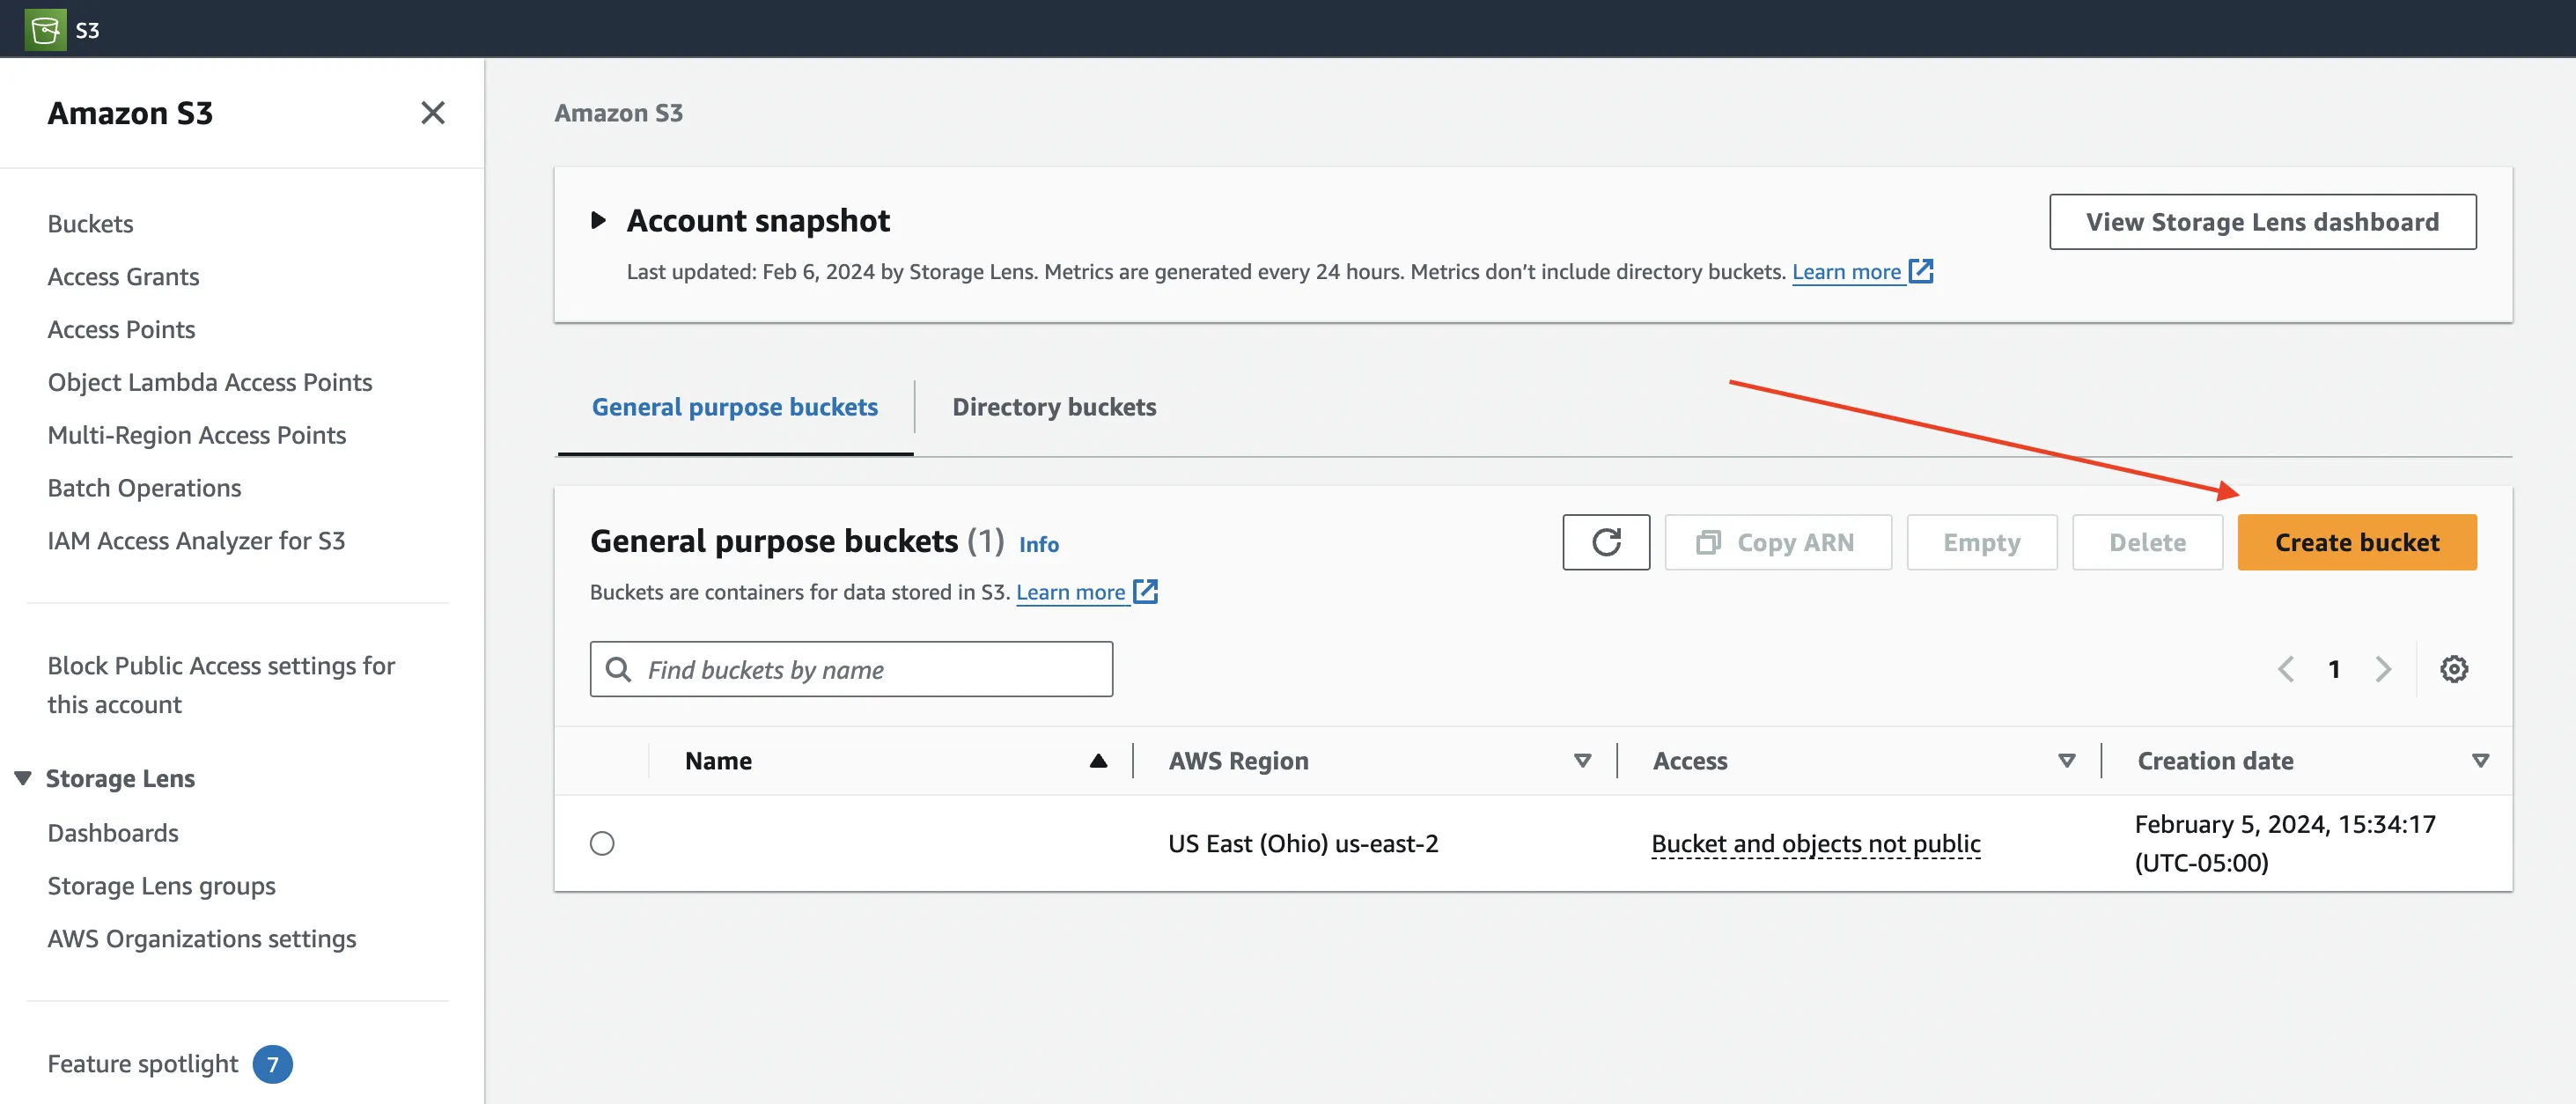
- Fill in the bucket name and region.
- Leave all the settings as default and click
Create bucket.
Change the CORS settings
Section titled “Change the CORS settings”Now we need to change some permissions on the bucket to allow for file uploads from your app:
-
Click on the bucket you just created.
-
Click on the
Permissionstab.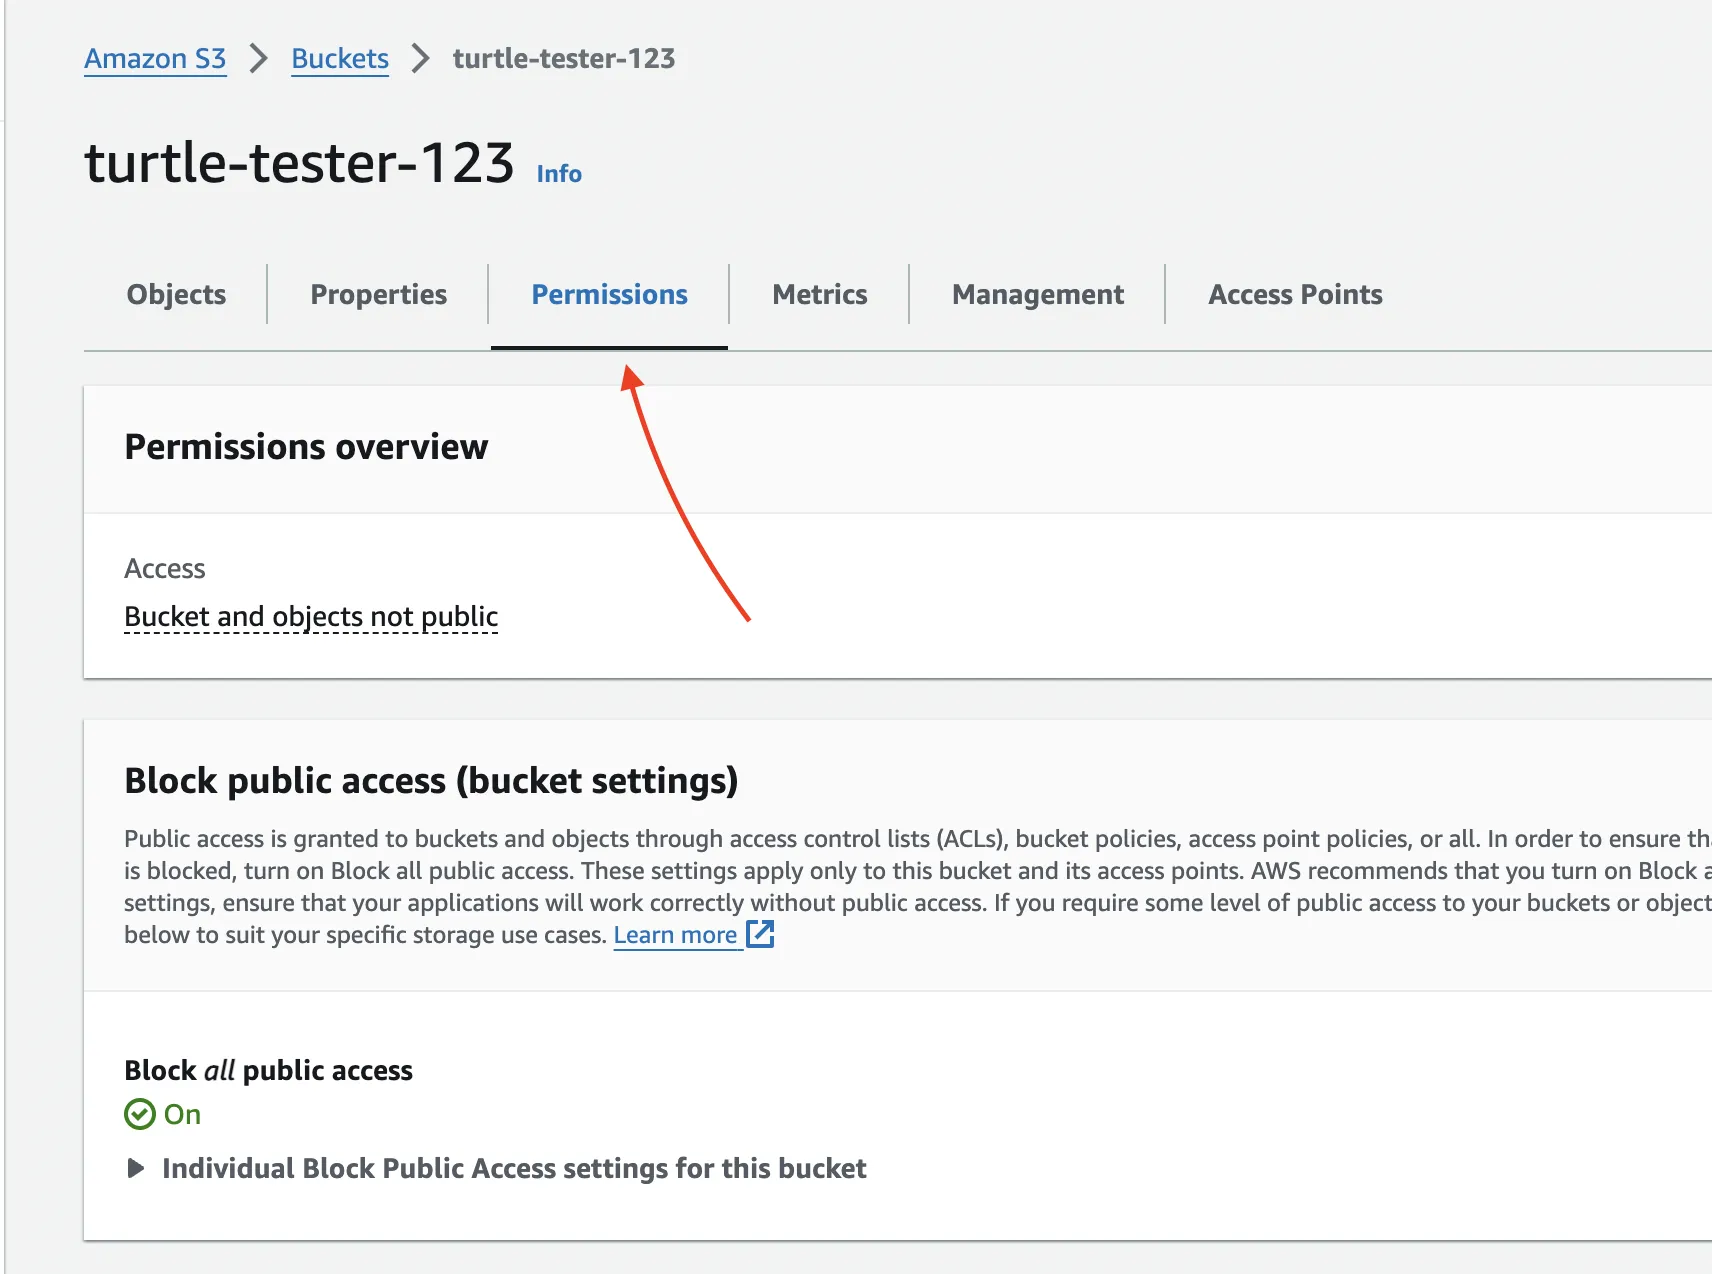
-
Scroll down to the
Cross-origin resource sharing (CORS)section and clickEdit.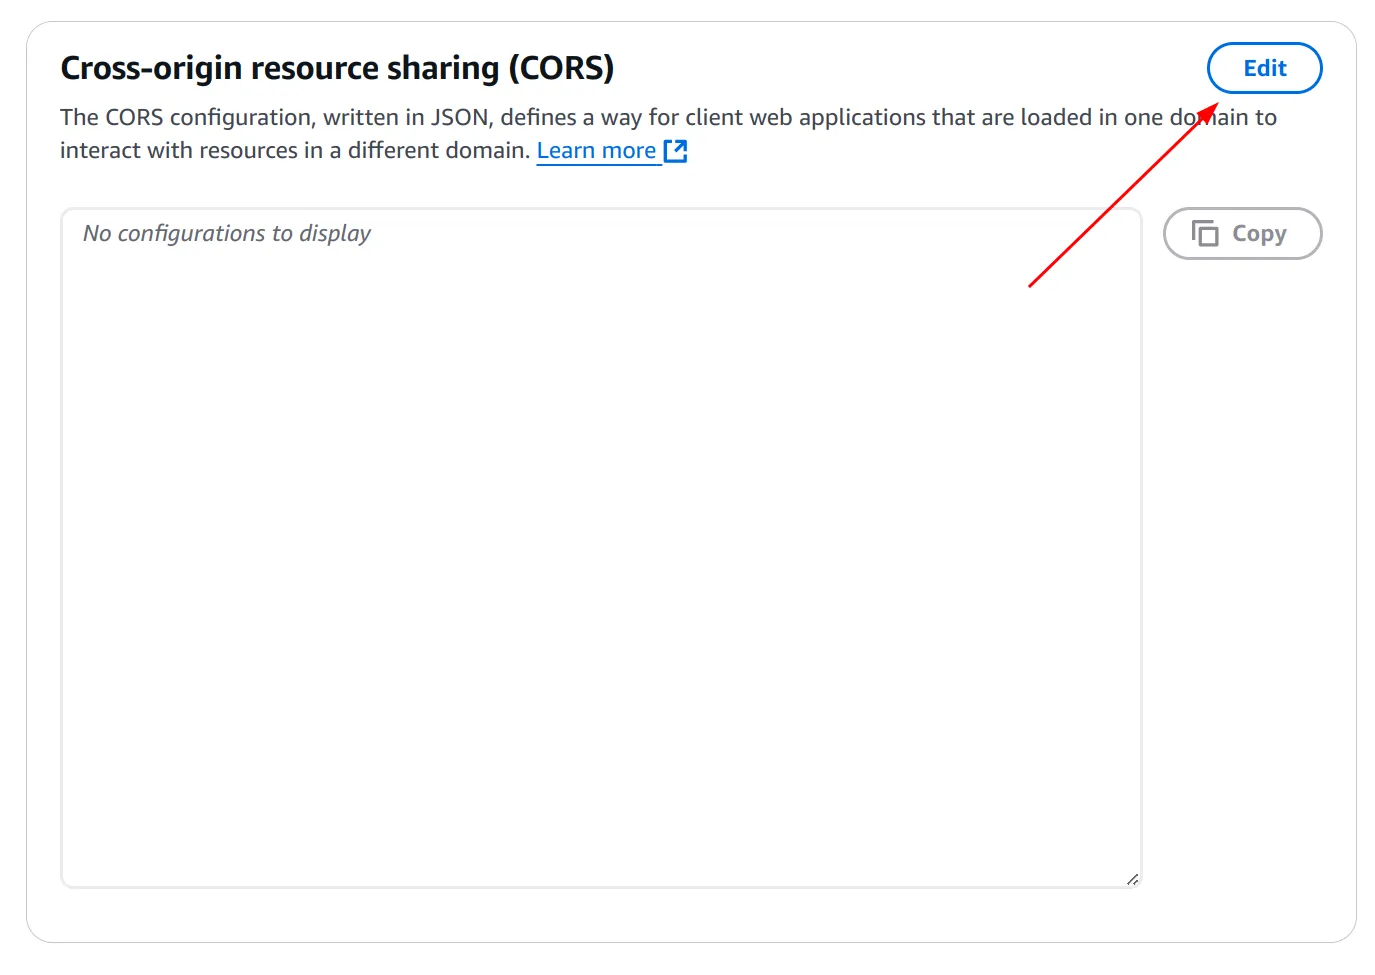
-
Insert the correct CORS configuration and click
Save changes. You can copy-paste most of the config below, but you must edit theAllowedOriginsfield to fit your app. Includehttp://localhost:3000for local development, andhttps://<your domain>for production.If you don’t yet have a domain name, just list
http://localhost:3000for now. We’ll remind you to add your domain before deploying to production in the Deployment docs.[{"AllowedHeaders": ["*"],"AllowedMethods": ["POST","GET"],"AllowedOrigins": ["http://localhost:3000","https://<your-domain>"],"ExposeHeaders": []}]
Get your AWS S3 credentials
Section titled “Get your AWS S3 credentials”Now that you have your S3 bucket set up, you’ll need to get your S3 credentials to use in your app:
- Click on your username in the top right corner of the AWS console and select
Security Credentials.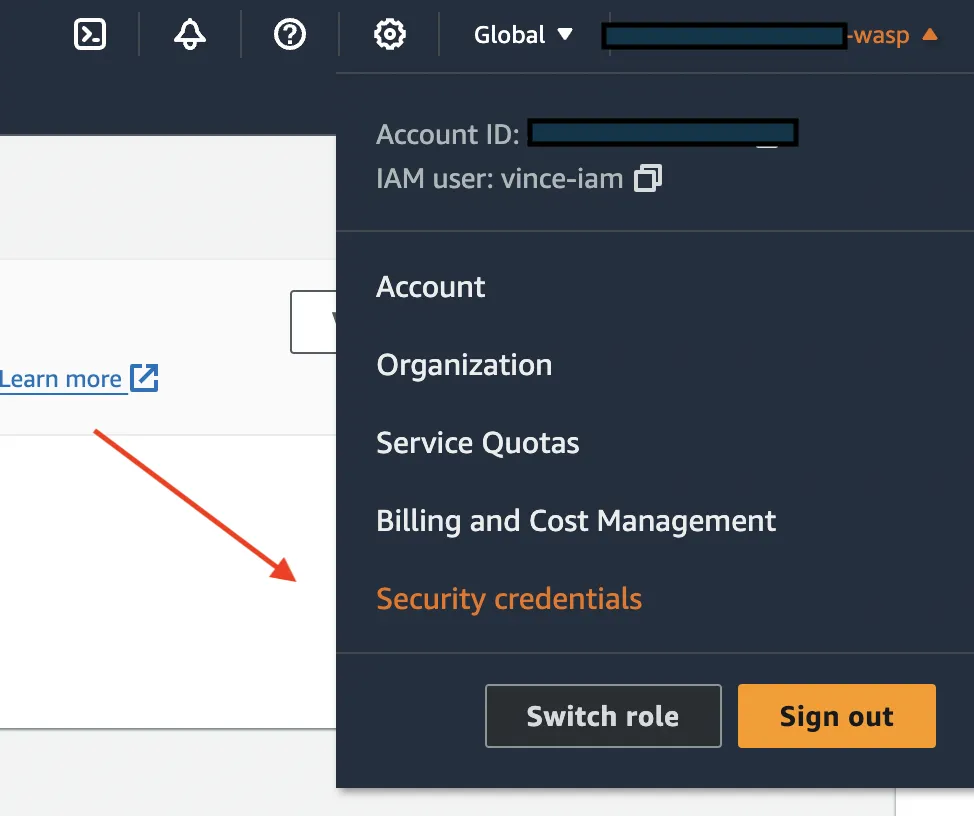
- Scroll down to the
Access keyssection. - Click on
Create Access Key. - Select the
Application running on an AWS serviceoption and create the access key.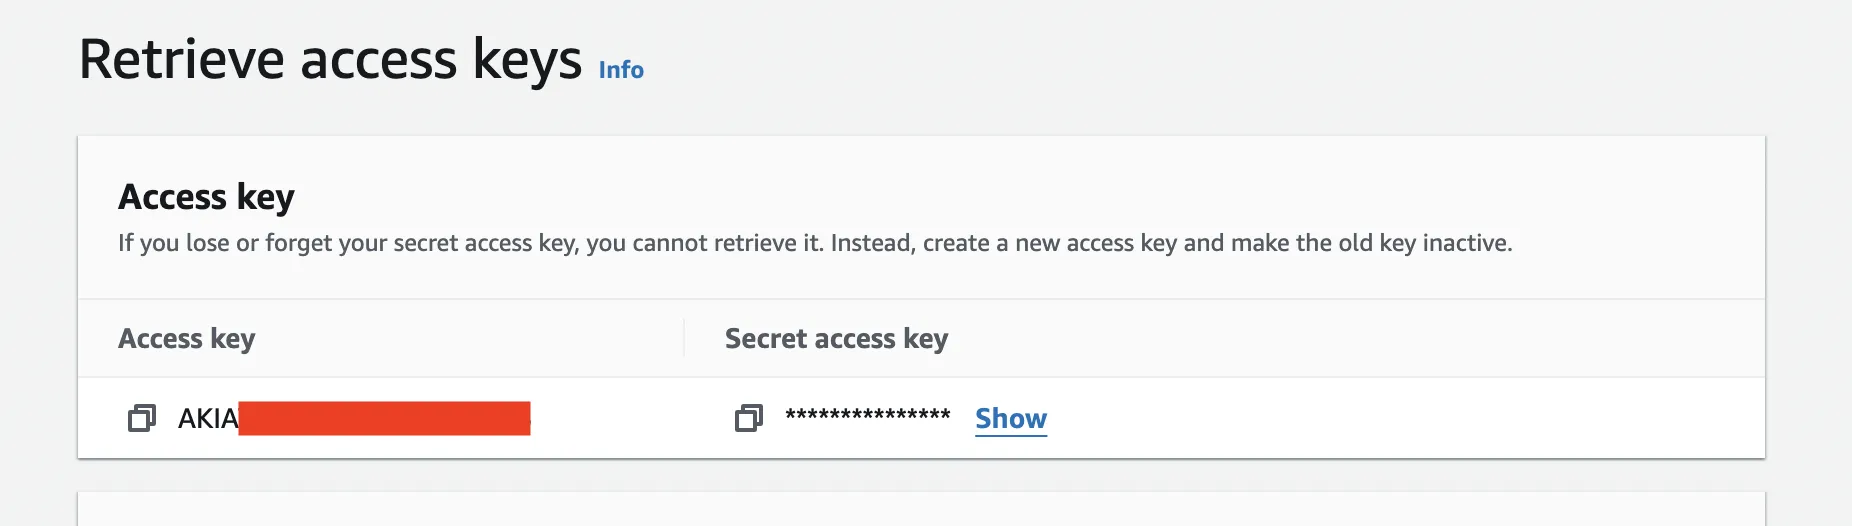
- Copy the
Access key IDandSecret access keyand paste them in yoursrc/app/.env.serverfile:Terminal window AWS_S3_IAM_ACCESS_KEY=ACK...AWS_S3_IAM_SECRET_KEY=t+33a...AWS_S3_FILES_BUCKET=your-bucket-nameAWS_S3_REGION=your-region // (e.g. us-west-2)
Using and Customizing File Uploads with S3 in your App
Section titled “Using and Customizing File Uploads with S3 in your App”With your S3 bucket set up and your AWS credentials in place, you can now start uploading files in your app using presigned URLs by navigating to localhost:3000/file-upload and uploading a file.
To begin customizing file uploads, is important to know where everything lives in your app. Here’s a quick overview:
main.wasp:- The
File entitycan be found here. Here you can modify the fields to suit your needs.
- The
src/file-upload/FileUploadPage.tsx:- The
FileUploadPagecomponent is where the file upload form lives. It also allows you to download the file from S3 by calling thegetDownloadFileSignedURLbased on that fileskeyin the app DB.
- The
src/file-upload/operations.ts:- The
createFileUploadUrlaction lives here and calls thegetUploadFileSignedURLFromS3within it using your AWS credentials before passing it to the client. This function stores the files in the S3 bucket within folders named after the user’s ID, so that each user’s files are stored separately. - The
getAllFilesByUserfetches all File information uploaded by the user. Note that the files do not exist in the app database, but rather the file data, its name and itskey, which is used to fetch the file from S3. - The
getDownloadFileSignedURLquery fetches the presigned URL for a file to be downloaded from S3 using the file’skeystored in the app’s database.
- The
Cleaning up “orphaned” files in S3
Section titled “Cleaning up “orphaned” files in S3”In the current logic, files are first deleted from the app’s database before attempting to delete them from S3. If, for some reason, the S3 deletion were to fail, the file would remain in S3 and not in the app’s database and be orphaned:
export const deleteFile: DeleteFile<DeleteFileInput, File> = async (  rawArgs,  context,) => {  // ...  const deletedFile = await context.entities.File.delete({    where: {      id: args.id,      user: {        id: context.user.id,      },    },  });
  try {    await deleteFileFromS3({ s3Key: deletedFile.s3Key });  } catch (error) {    console.error(      `S3 deletion failed. Orphaned file s3Key: ${deletedFile.s3Key}`,      error,    );  }};
To clean up these orphaned files, you can add a cleanup job (that runs at an interval of your choosing) to:
- Fetch all file keys from S3.
- Fetch all file keys from the app’s database.
- Compare the two lists and delete any files from S3 that are not in the database.
Here’s an example of how you could implement this:
job cleanUpOrphanedFilesS3Job { executor: PgBoss, perform: { fn: import { cleanUpOrphanedFilesS3 } from "@src/file-upload/workers" }, schedule: { cron: "0 5 * * 0" // Every week on Sunday at 5am. }, entities: [File]}import type { CleanUpOrphanedFilesS3Job } from 'wasp/server/jobs';import { s3Client, deleteFileFromS3 } from './s3Utils';import { ListObjectsV2Command, ListObjectsV2CommandOutput } from '@aws-sdk/client-s3';
export const cleanUpOrphanedFilesS3: CleanUpOrphanedFilesS3Job<never, void> = async ( _rawArgs, context) => { const allFileKeysFromS3 = await fetchAllFileKeysFromS3(); const allFileKeysFromDb = await context.entities.File.findMany({ select: { s3Key: true }, }); await findAndDeleteOrphanedFilesInS3(allFileKeysFromS3, allFileKeysFromDb);};
async function fetchAllFileKeysFromS3(): Promise<string[]> { const allS3Keys: string[] = []; let continuationToken: string | undefined;
do { const command = new ListObjectsV2Command({ Bucket: env.AWS_S3_FILES_BUCKET, ContinuationToken: continuationToken, });
const response: ListObjectsV2CommandOutput = await s3Client.send(command);
if (response.Contents) { const keys = response.Contents.reduce((acc: string[], object) => { if (object.Key) { acc.push(object.Key); } return acc; }, []); allS3Keys.push(...keys); }
continuationToken = response.NextContinuationToken; } while (continuationToken);
console.log(`Found ${allS3Keys.length} total files in S3`);
return allS3Keys;};
async function findAndDeleteOrphanedFilesInS3( allFileKeysFromS3: string[], allFileKeysFromDb: { s3Key: string }[]): Promise<void> { const s3KeysNotFoundInDb = allFileKeysFromS3.filter( (s3Key) => !allFileKeysFromDb.some((file) => file.s3Key === s3Key) );
// Delete files from S3 that are not in the database. // If any file deletion fails, the job can continue and pick it up next run. const s3DeletionResults = await Promise.allSettled( s3KeysNotFoundInDb.map((s3Key) => deleteFileFromS3({ s3Key })) );
const successfulDeletions = s3DeletionResults.filter((result) => result.status === 'fulfilled');
console.log( `Successfully deleted ${successfulDeletions.length} out of ${s3KeysNotFoundInDb.length} orphaned files from S3` );};Using Multer to upload files to your server
Section titled “Using Multer to upload files to your server”If you’re looking to upload files to the app server, you can use the Multer middleware to handle file uploads. This will allow you to store files on your server and is a good option if you need a quick and dirty, free solution for simple file uploads.
Below are GitHub Gists that show you how to set up file uploads using Multer in your app:
To set up file uploads using Multer, follow the Wasp integration guide.