Lemon Squeezy
First, make sure you’ve defined your payment processor in src/payment/paymentProcessor.ts, as described in the important first steps.
Next, you’ll need to create a Lemon Squeezy account in test mode. You can do that here.
Get your test Lemon Squeezy API Keys
Once you’ve created your account, you’ll need to get your test API keys. You can do that by navigating to https://app.lemonsqueezy.com/settings/api and creating a new API key:
- Click on the
+button. - Give your API key a name.
- Copy and paste it in your
.env.serverfile underLEMONSQUEEZY_API_KEY.
Get your Lemon Squeezy Store ID
To get your store ID, go to the Lemon Squeezy Dashboard and copy the Store ID from the top right corner.
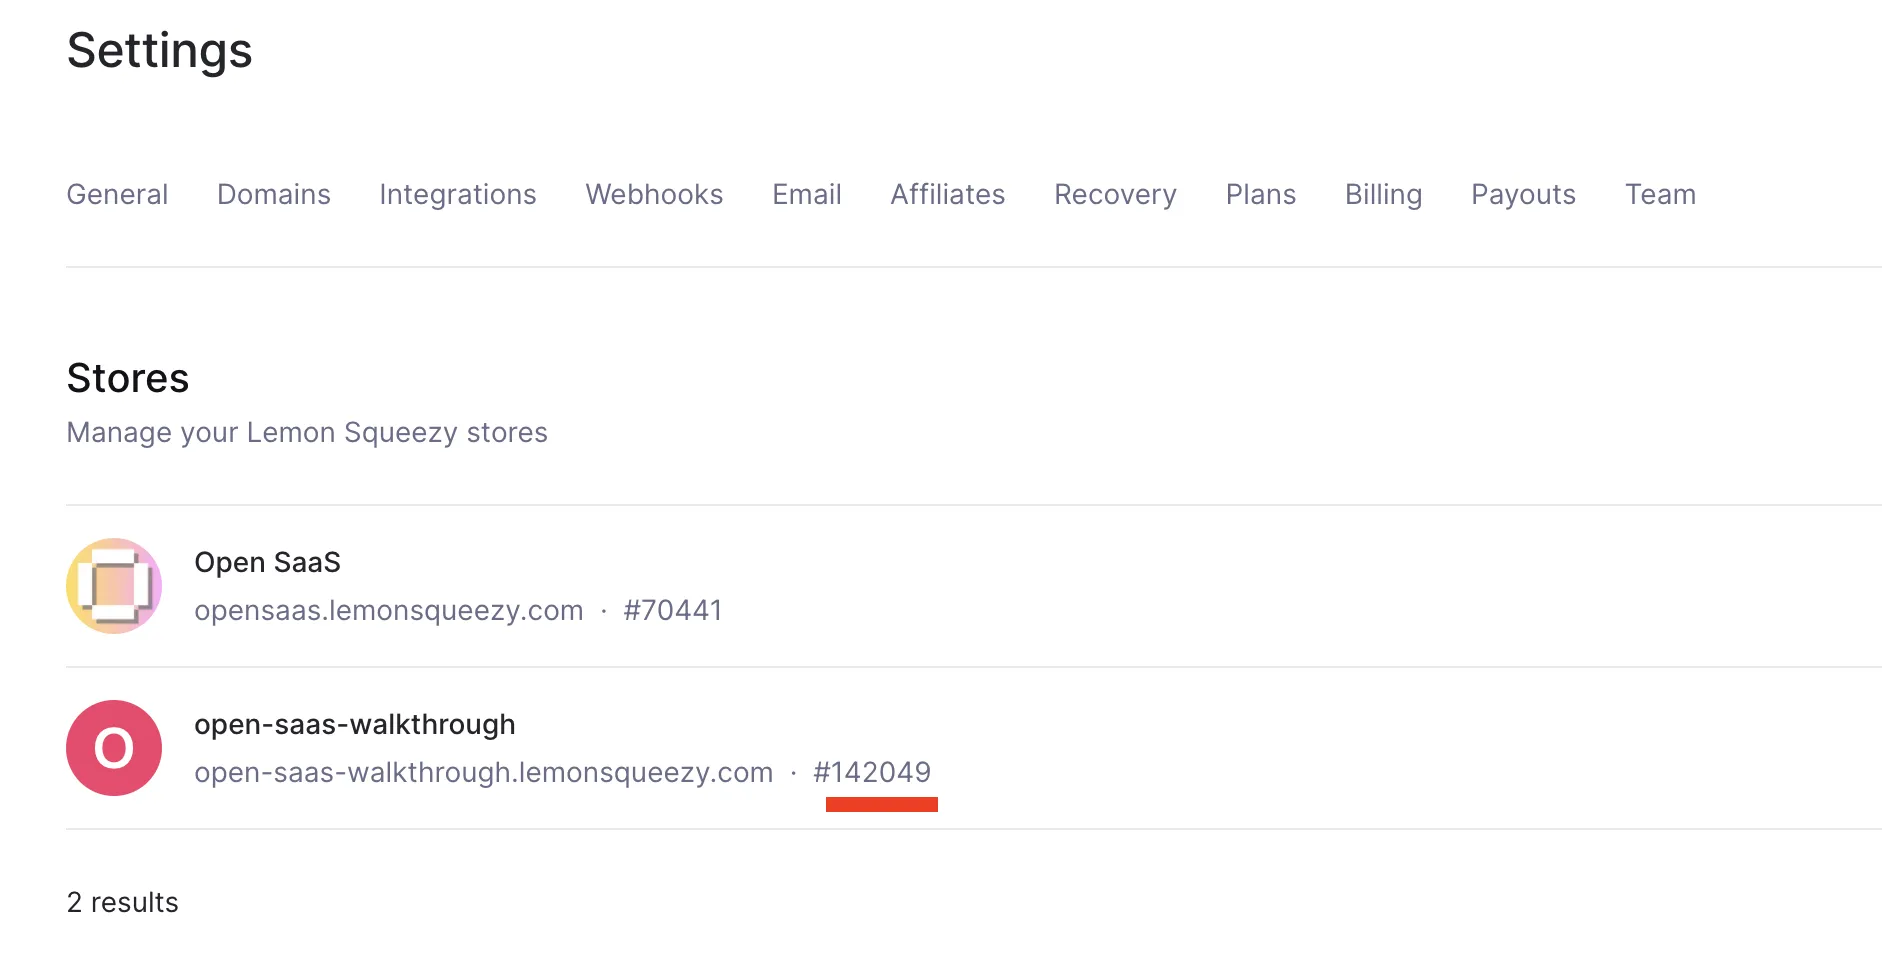
Copy and paste this number in your .env.server file under LEMONSQUEEZY_STORE_ID.
Creating Products
To create a product, go to the test products url https://app.lemonsqueezy.com/products:
- Click on the
+ New Productbutton and fill in the relevant information for your product. - Fill in the general information.
- For pricing, select the type of product you’d like to create, e.g.
Subscriptionfor a recurring monthly payment product orSingle Paymentfor credits-based product.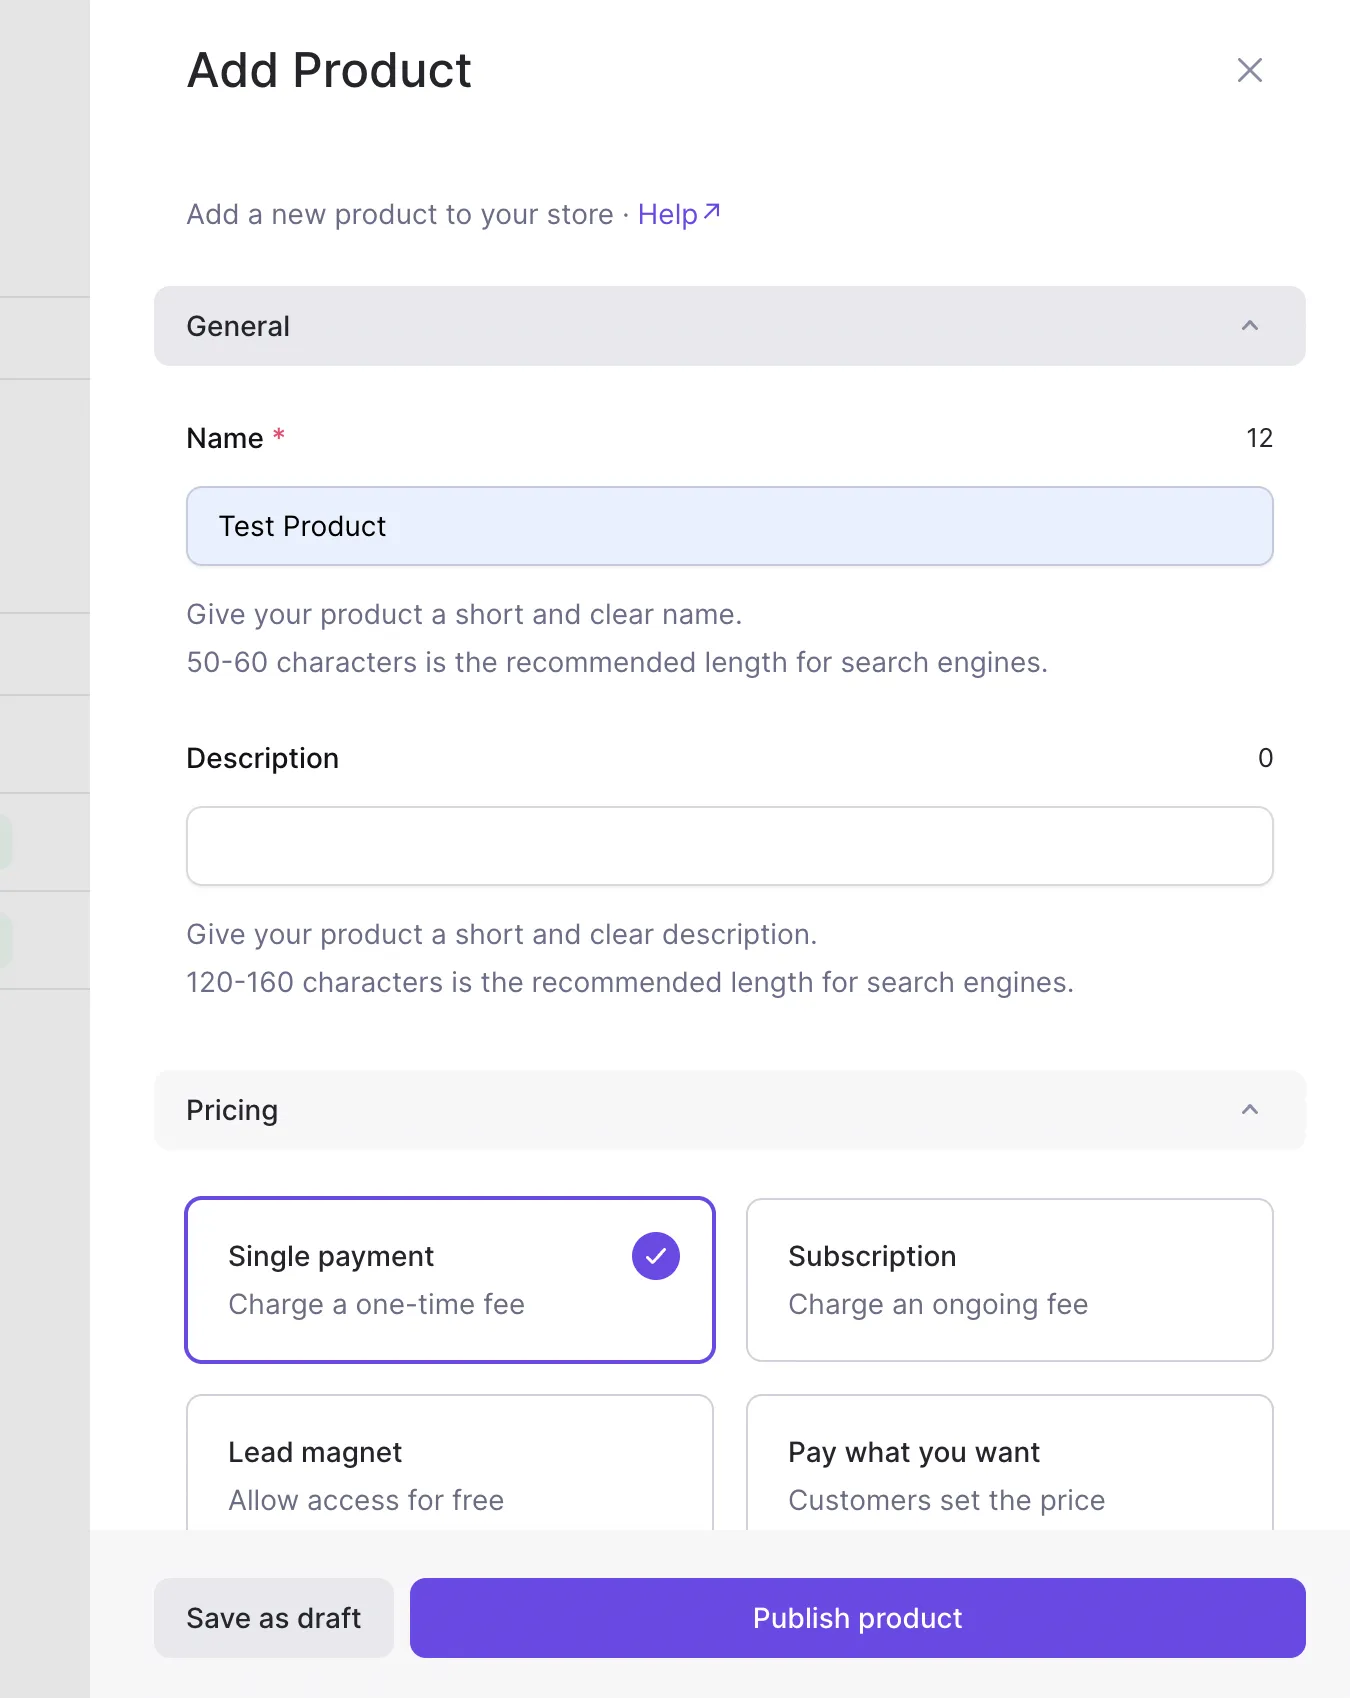
- Make sure you select
Software as a service (SaaS)as the Tax category type. - If you want to add different price tiers for
Subscriptionproducts, click onadd variantunder thevariantstab. Here you can input the name of the variant (e.g. “Hobby”, “Pro”), and that variant’s price.
- For a product with no variants, on the product page, click the
...menu button and selectCopy variant ID
- For a product with variants, on the product page, click on the product, go to the variants tab and select
Copy IDfor each variant.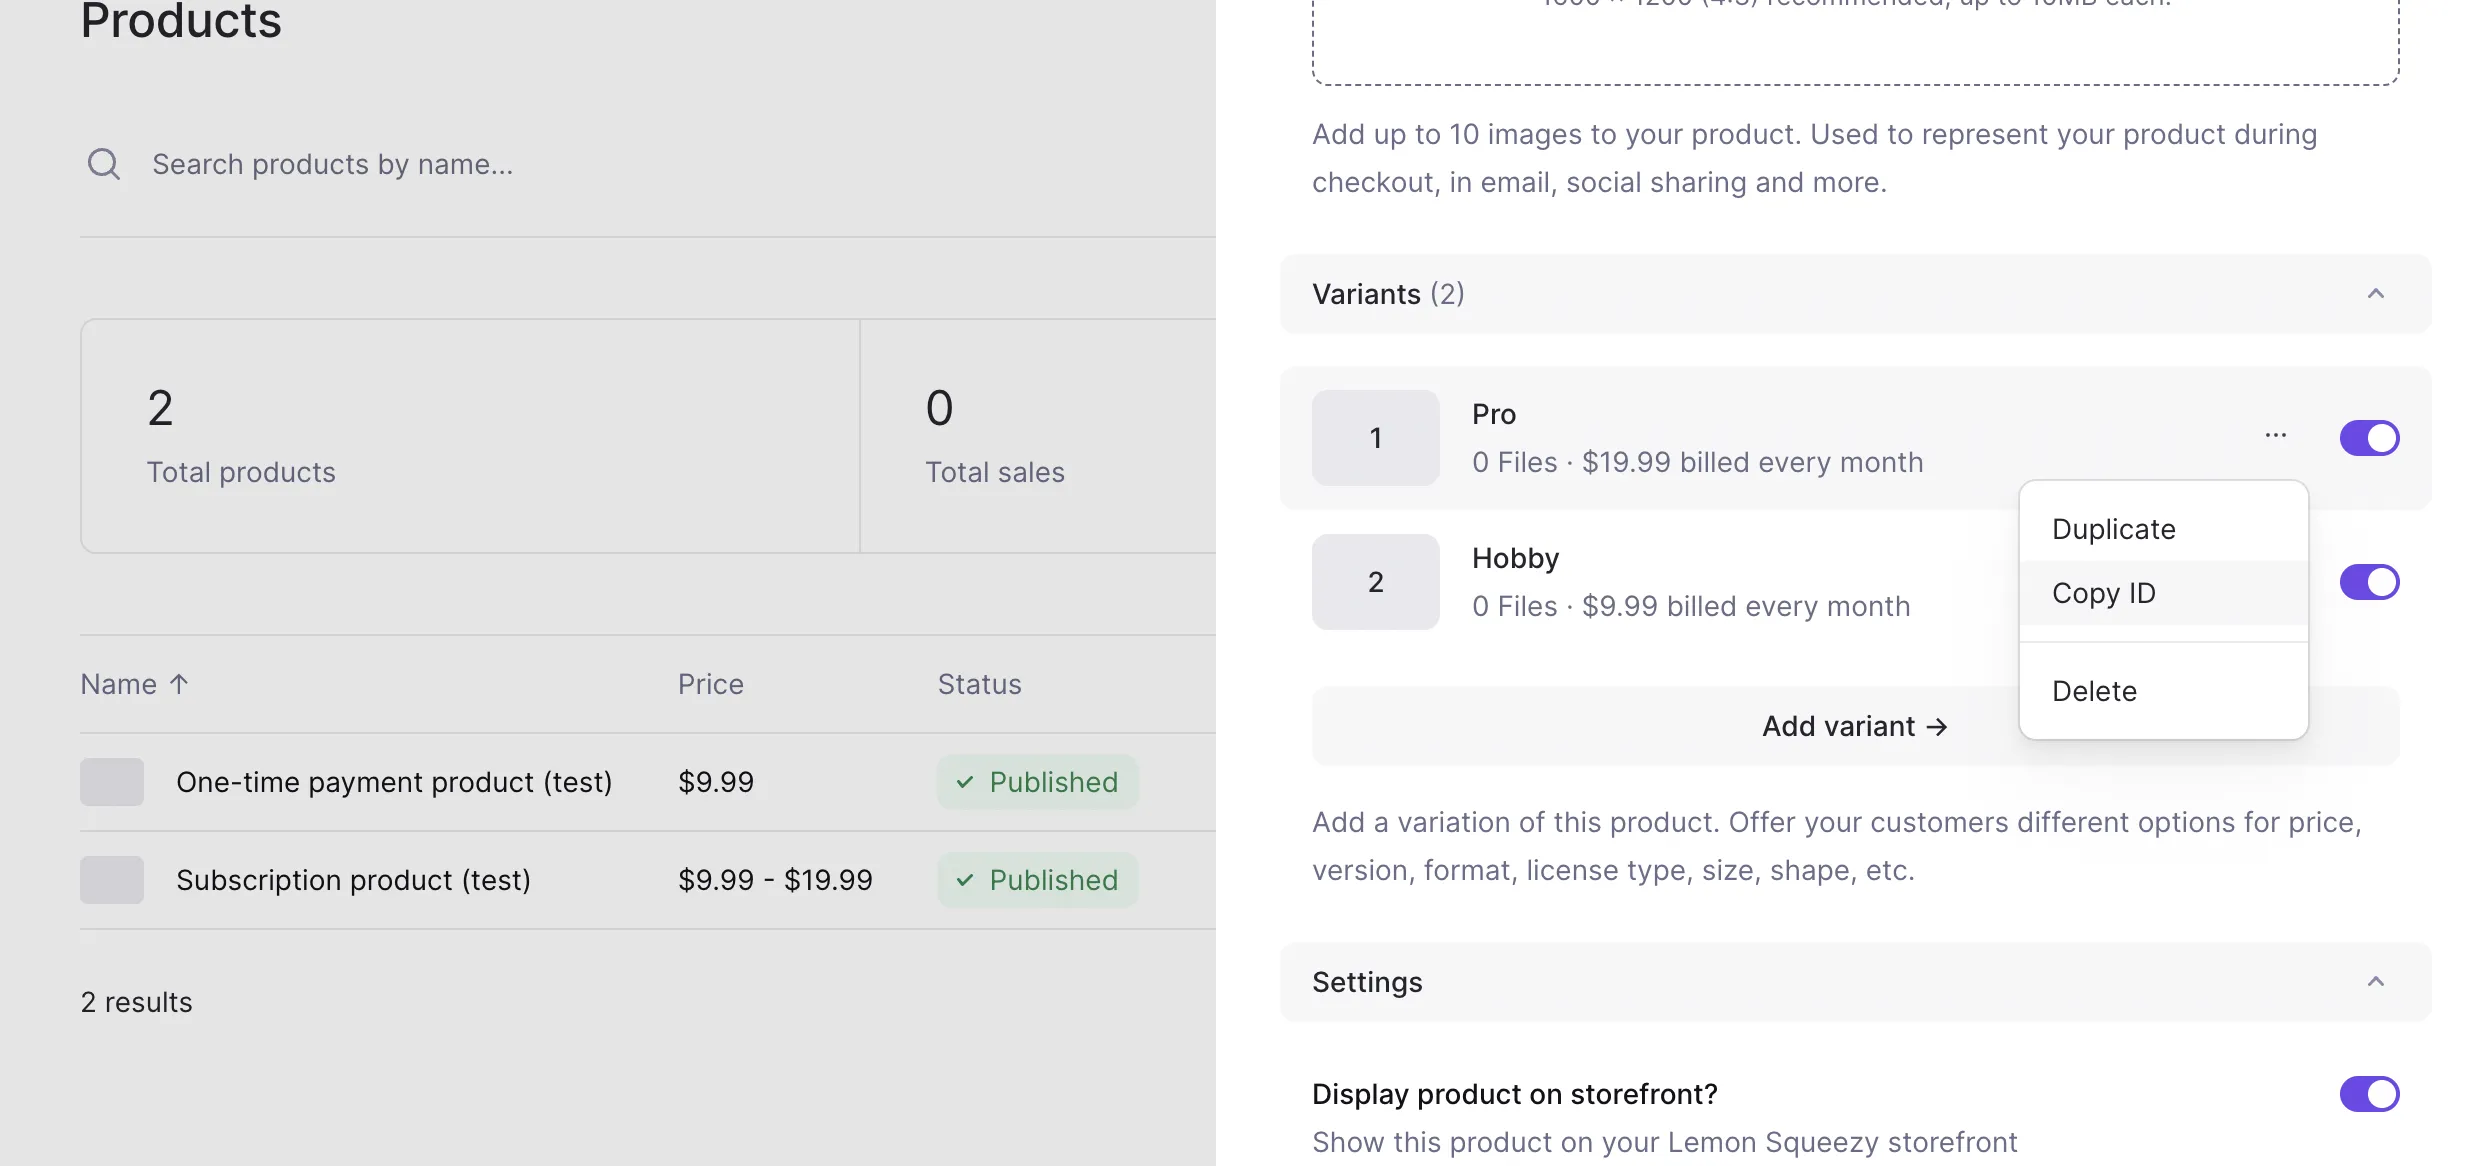
- Paste these IDs in the
.env.serverfile:- We’ve set you up with two example subscription product environment variables,
PAYMENTS_HOBBY_SUBSCRIPTION_PLAN_IDandPAYMENTS_PRO_SUBSCRIPTION_PLAN_ID. - As well as a one-time payment product/credits-based environment variable,
PAYMENTS_CREDITS_10_PLAN_ID.
- We’ve set you up with two example subscription product environment variables,
Using Lemon Squeezy Webhook in Local Development
Exposing your Webhook Endpoint to the Internet
Lemon Squeezy notifies your Wasp app about customer and payment events through a webhook. However, to make it available to Lemon Squeezy during development, you need to expose your locally running Wasp server (started with wasp start) to the internet.
You can do that by running ngrok on port 3001 (Wasp server runs on port 3001 by default). ngrok will then generate a public URL that we can provide to Lemon Squeezy:
- First, make sure you have installed
ngrok. - Once
ngrokis installed and your Wasp app is running, run:Terminal window ngrok http 3001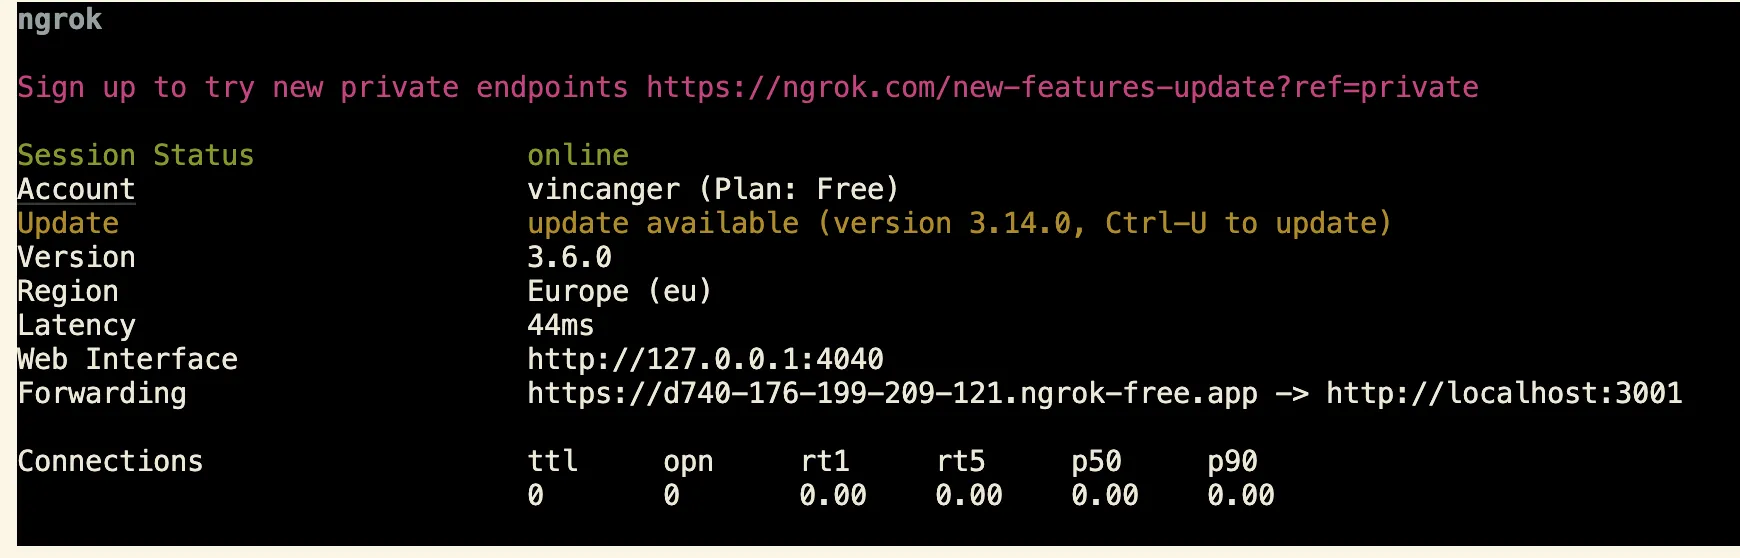
ngrokwill display a forwarding address. Copy this address and append/payments-webhookto it. It should look something like this:Callback URL https://89e5-2003-c7-153c-72a5-f837.ngrok-free.app/payments-webhook
Creating your Lemon Squeezy Webhook
Next, go to your Lemon Squeezy Webhooks Dashboard:
- Click the
+button. - Add the newly created webhook forwarding url to the
Callback URLsection. - Give your webhook a signing secret (a long, random string).
- Copy and paste this same signing secret into your
.env.serverfile underLEMONSQUEEZY_WEBHOOK_SECRET. - Make sure to select at least the following updates to be sent:
order_createdsubscription_createdsubscription_updatedsubscription_cancelled
- Click
save.
You’re now ready to start consuming Lemon Squeezy webhook events in local development.