Payments Integration
This guide will show you how to set up Payments for testing and local development with the following payment processors:
- Stripe
- Lemon Squeezy
Important First Steps
First, go to /src/payment/paymentProcessor.ts and choose which payment processor you’d like to use, e.g. Stripe or Lemon Squeezy:
import { stripePaymentProcessor } from './stripe/paymentProcessor';import { lemonSqueezyPaymentProcessor } from './lemonSqueezy/paymentProcessor';//...
export const paymentProcessor: PaymentProcessor = stripePaymentProcessor;// or...export const paymentProcessor: PaymentProcessor = lemonSqueezyPaymentProcessor;
At this point, you can delete:
- the unused payment processor code within the
/src/payment/<unused-provider>directory, - any unused environment variables from
.env.server(they will be prefixed with the name of the provider your are not using):- e.g.
STRIPE_API_KEY,LEMONSQUEEZY_API_KEY
- e.g.
- Make sure to also uninstall the unused dependencies:
npm uninstall @lemonsqueezy/lemonsqueezy.js- or
npm uninstall stripe
- Remove any unused fields from the
Usermodel in theschema.prismafile if they exist:- e.g.
lemonSqueezyCustomerPortalUrl
- e.g.
Now your code is ready to go with your preferred payment processor and it’s time to configure your payment processor’s API keys, products, and other settings.
Stripe
First, you’ll need to create a Stripe account. You can do that here.
Get your test Stripe API Keys
Once you’ve created your account, you’ll need to get your test API keys. You can do that by navigating to https://dashboard.stripe.com/test/apikeys or by going to the Stripe Dashboard and clicking on the Developers.
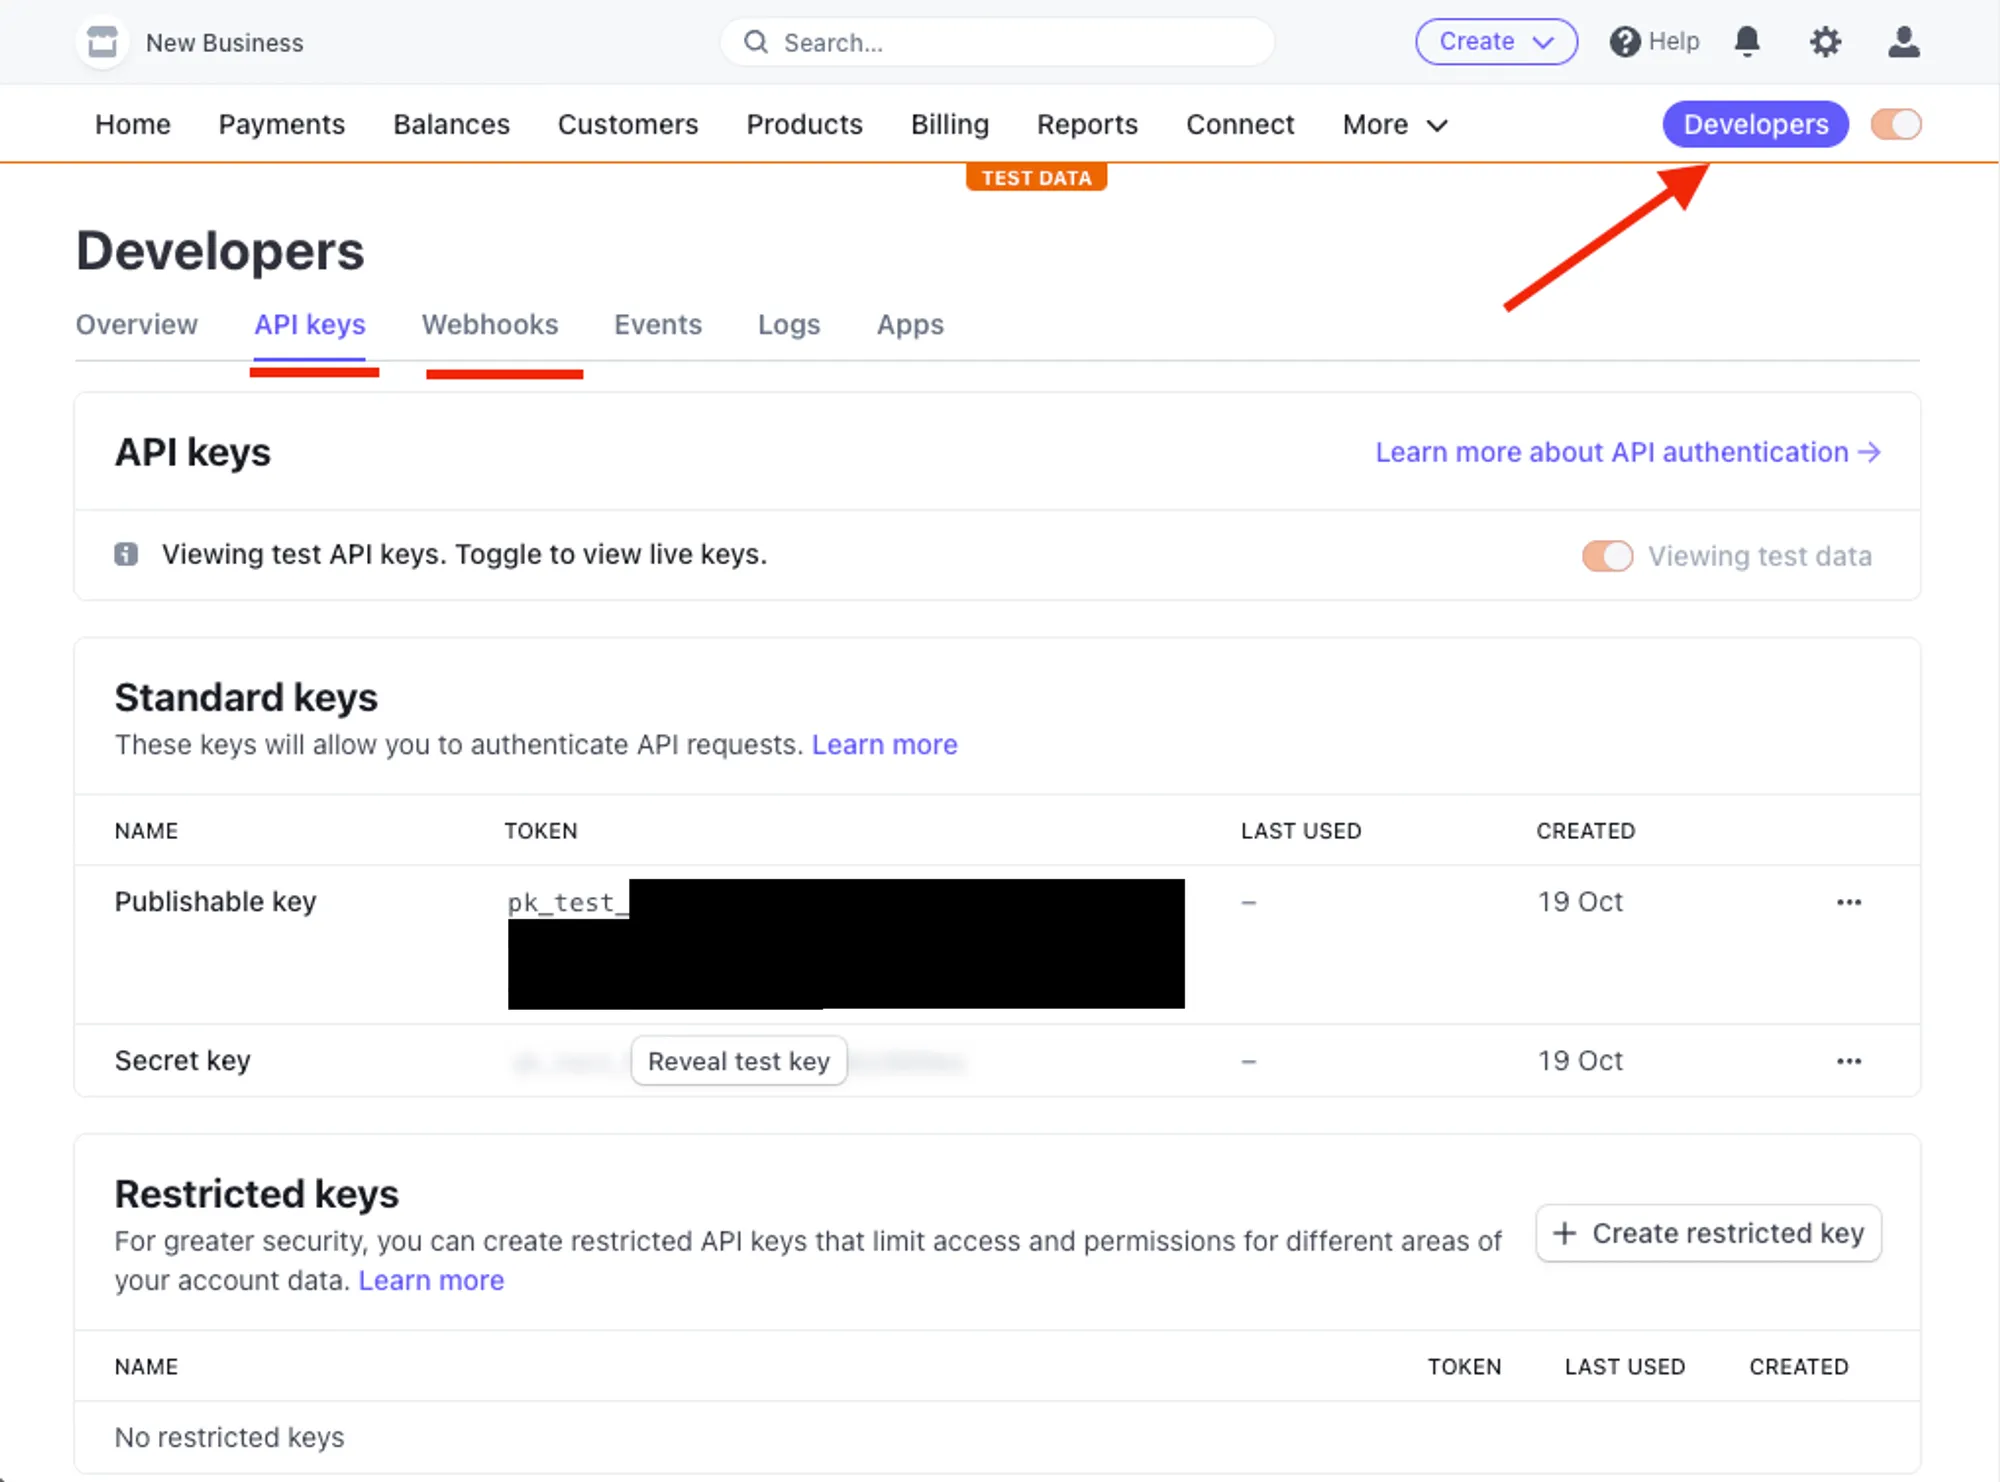
- Click on the
Reveal test key tokenbutton and copy theSecret key. - Paste it in your
.env.serverfile underSTRIPE_API_KEY=
Create Test Products
To create a test product, go to the test products url https://dashboard.stripe.com/test/products, or after navigating to your dashboard, click the test mode toggle.
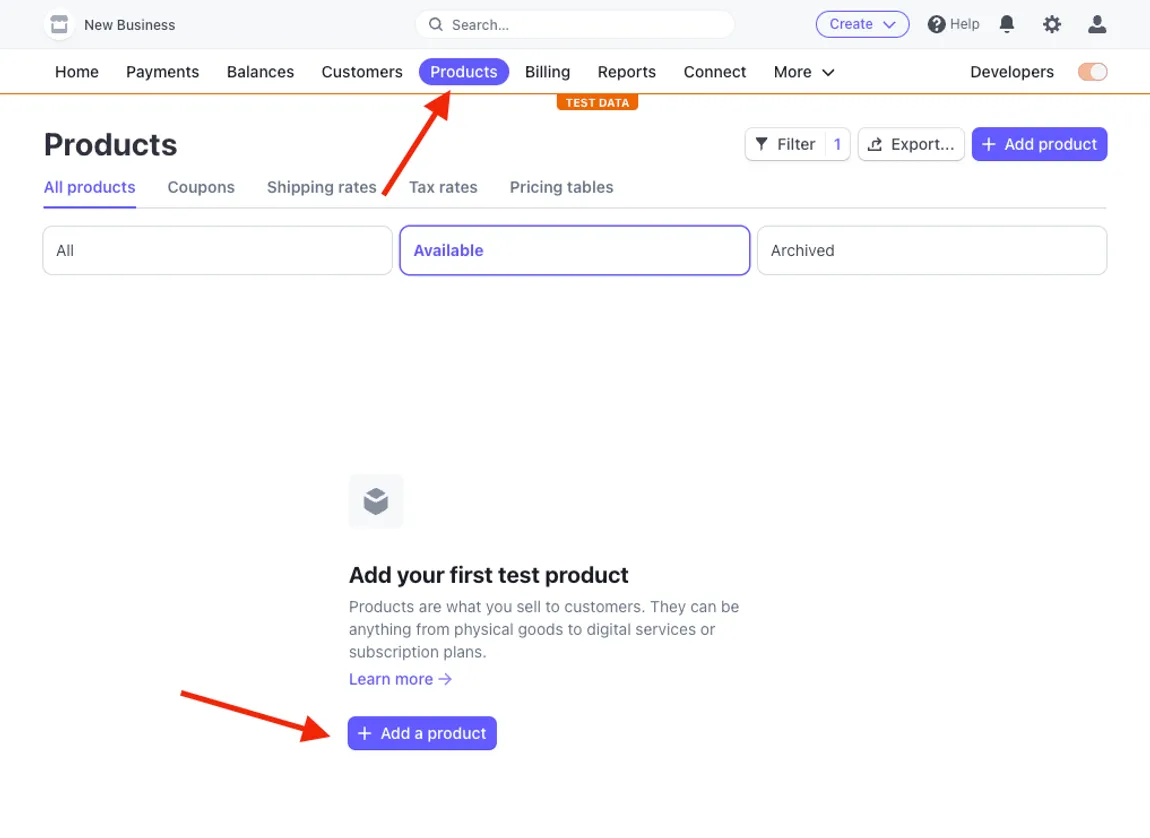
- Click on the
Add a productbutton and fill in the relevant information for your product. - Make sure you select
Software as a service (SaaS)as the product type. - For Subscription products, make sure you select
Recurringas the billing type. - For One-time payment products, make sure you select
One-timeas the billing type. - If you intend to let your users switch between two subscription plans, e.g. upgrade from hobby to pro, you’ll need to create two separate products and with their own price IDs. The ability for users to swich plans can then be configured later in the Customer Portal.
- If you want to add different price tiers for the same product (e.g. monthly and yearly), click the
Add another pricebutton at the buttom.
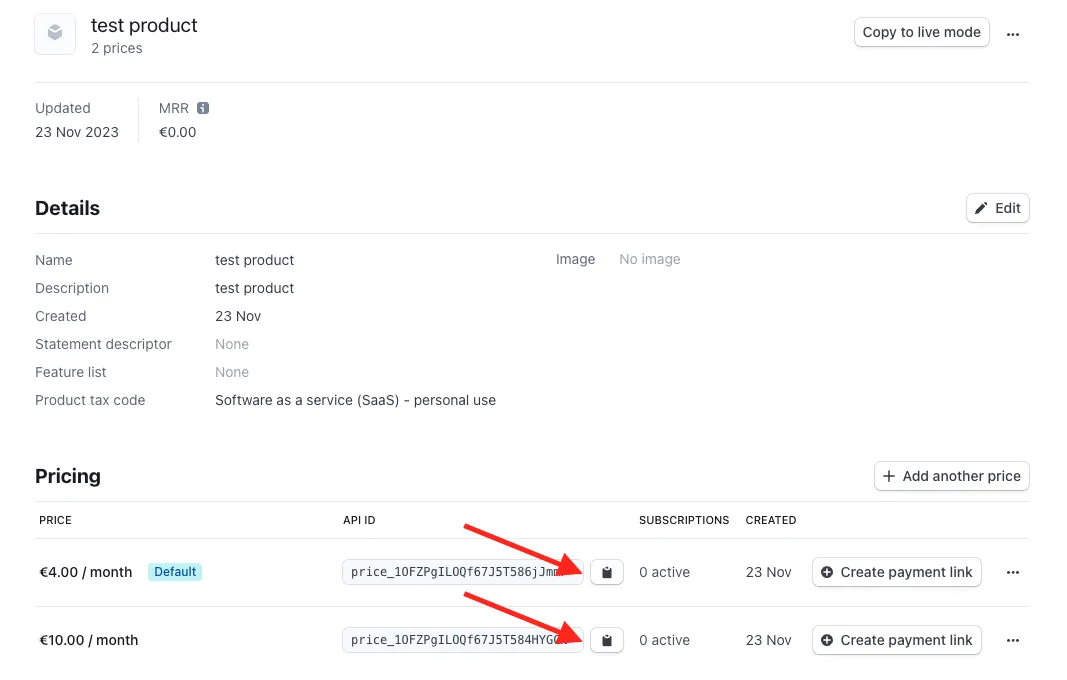
- After you save the product, you’ll be directed to the product page.
- Copy the price IDs and paste them in the
.env.serverfile- We’ve set you up with two example subscription product environment variables,
PAYMENTS_HOBBY_SUBSCRIPTION_PLAN_ID=andPAYMENTS_PRO_SUBSCRIPTION_PLAN_ID=. - As well as a one-time payment product/credits-based environment variable,
PAYMENTS_CREDITS_10_PLAN_ID=.
- We’ve set you up with two example subscription product environment variables,
- Note that if you change the names of the price IDs, you’ll need to update your server code to match these names as well
Create a Test Customer
You can create a test customer in the Stripe Dashboard.
- Click on the
Add a customerbutton and fill in the relevant information for your test customer.
Alternatively, Open SasS automatically creates a test customer the first time a user starts a checkout session. This customer is linked to the email address associated with the user in your app.
Set up the Customer Portal
You can set up your customer portal in your Stripe Dashboard.
By default, OpenSaas generates a unique customer portal link for each user on the back end.
If you’d rather provide a permanent link to the customer portal, activate it and copy the Portal link.
If you’d like to give users the ability to switch between different plans, e.g., upgrade from a “Hobby” to a “Pro” subscription, go down to the Subscriptions dropdown and select customers can switch plans.
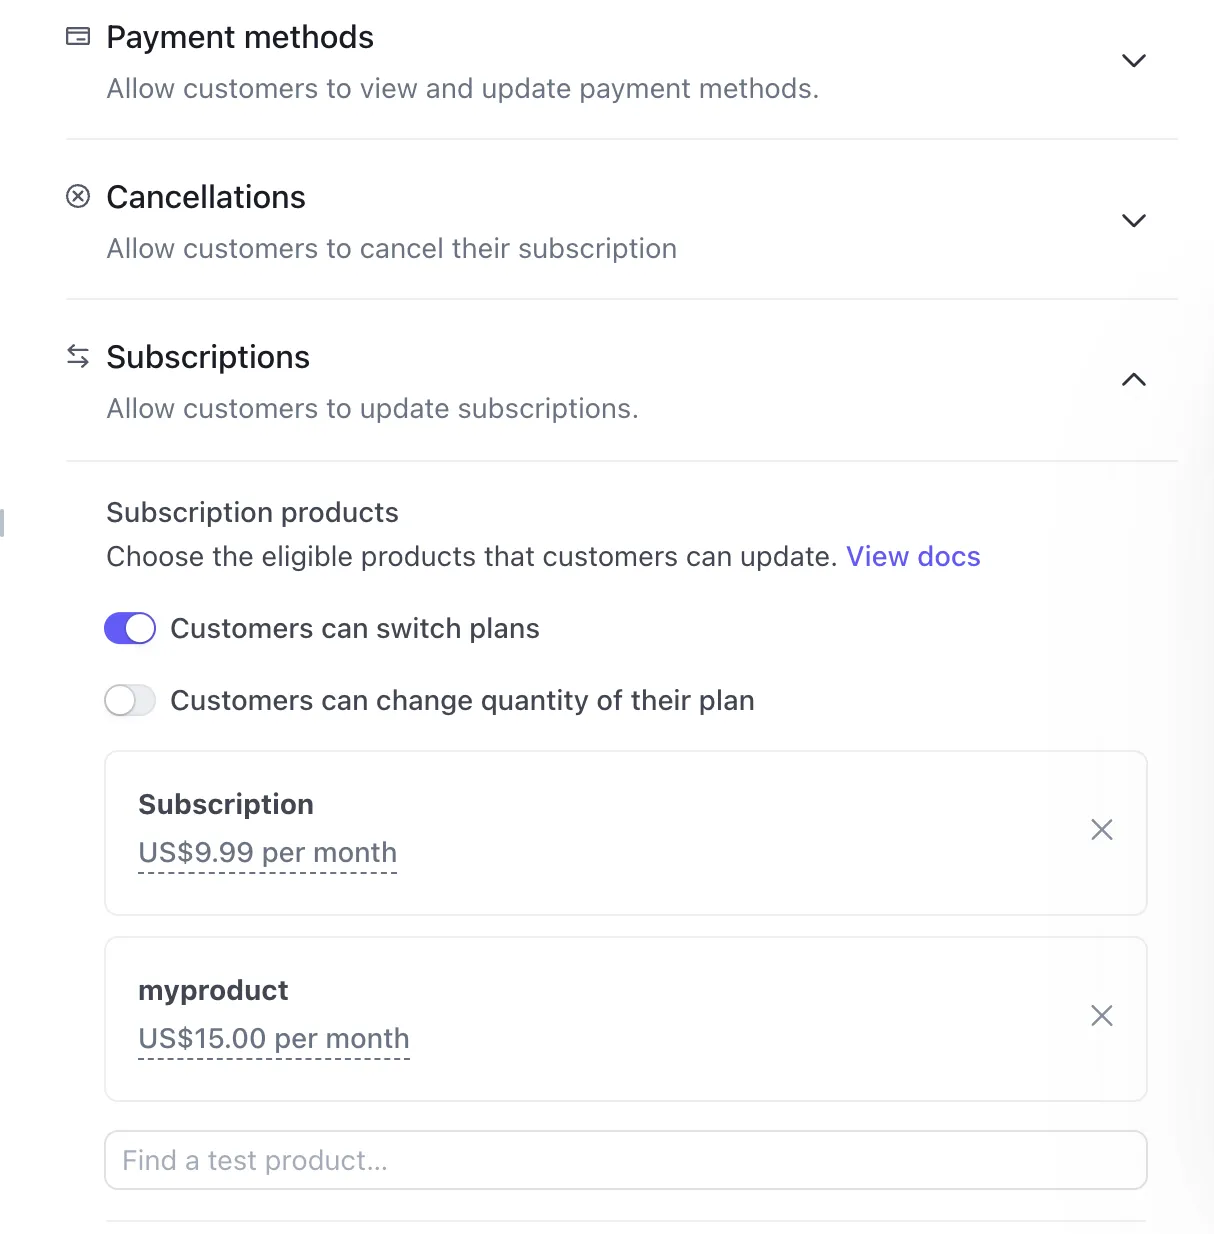
Then select the products you’d like them to be able to switch between.
Now, after your users have paid, they can click on Manage Subscription in the client and will be taken to the customer portal where they can update their current plan.
Install the Stripe CLI
To install the Stripe CLI with homebrew, run the following command in your terminal:
brew install stripe/stripe-cli/stripeor for other install scripts or OSes, follow the instructions here.
Now, let’s start the webhook server and get our webhook signing secret.
First, login:
stripe loginstripe listen --forward-to localhost:3001/payments-webhookYou should see a message like this:
> Ready! You are using Stripe API Version [2023-08-16]. Your webhook signing secret is whsec_8a... (^C to quit)copy this secret to your .env.server file under STRIPE_WEBHOOK_SECRET=.
Testing Webhooks via the Stripe CLI
- In a new terminal window, run the following command:
stripe login- start the Stripe CLI webhook forwarding on port 3001 where your Node server is running.
stripe listen --forward-to localhost:3001/payments-webhookremember to copy and paste the outputted webhook signing secret (whsec_...) into your .env.server file under STRIPE_WEBHOOK_SECRET= if you haven’t already.
- In another terminal window, trigger a test event:
stripe trigger payment_intent.succeededThe results of the event firing will be visible in the initial terminal window. You should see messages like this:
...2023-11-21 09:31:09 --> invoice.paid [evt_1OEpMPILOQf67J5TjrUgRpk4]2023-11-21 09:31:09 <-- [200] POST http://localhost:3001/payments-webhook [evt_1OEpMPILOQf67J5TjrUgRpk4]2023-11-21 09:31:10 --> invoice.payment_succeeded [evt_1OEpMPILOQf67J5T3MFBr1bq]2023-11-21 09:31:10 <-- [200] POST http://localhost:3001/payments-webhook [evt_1OEpMPILOQf67J5T3MFBr1bq]2023-11-21 09:31:10 --> checkout.session.completed [evt_1OEpMQILOQf67J5ThTZ0999r]2023-11-21 09:31:11 <-- [200] POST http://localhost:3001/payments-webhook [evt_1OEpMQILOQf67J5ThTZ0999r]For more info on testing webhooks, check out https://stripe.com/docs/webhooks#test-webhook
Testing Checkout and Payments via the Client
Make sure the Stripe CLI is running by following the steps above. You can then test the payment flow via the client by doing the following:
-
Click on a Buy button on the for any of the products on the homepage. You should be redirected to the checkout page.
-
Fill in the form with the following test credit card number
4242 4242 4242 4242and any future date for the expiration date and any 3 digits for the CVC. -
Click on the “Pay” button. You should be redirected to the success page.
-
Check your terminal window for status messages and logs
-
You can also check your Database via the DB Studio to see if the user entity has been updated by running:
wasp db studio
- Navigate to
localhost:5555and click on theuserstable. You should see thesubscriptionStatusisactivefor the user that just made the purchase.
Lemon Squeezy
First, make sure you’ve defined your payment processor in src/payment/paymentProcessor.ts, as described in the important first steps.
Next, you’ll need to create a Lemon Squeezy account in test mode. You can do that here.
Get your test Lemon Squeezy API Keys
Once you’ve created your account, you’ll need to get your test API keys. You can do that by navigating to https://app.lemonsqueezy.com/settings/api and creating a new API key.
- Click on the
+button - Give your API key a name
- Copy and paste it in your
.env.serverfile underLEMONSQUEEZY_API_KEY=
Get your Lemon Squeezy Store ID
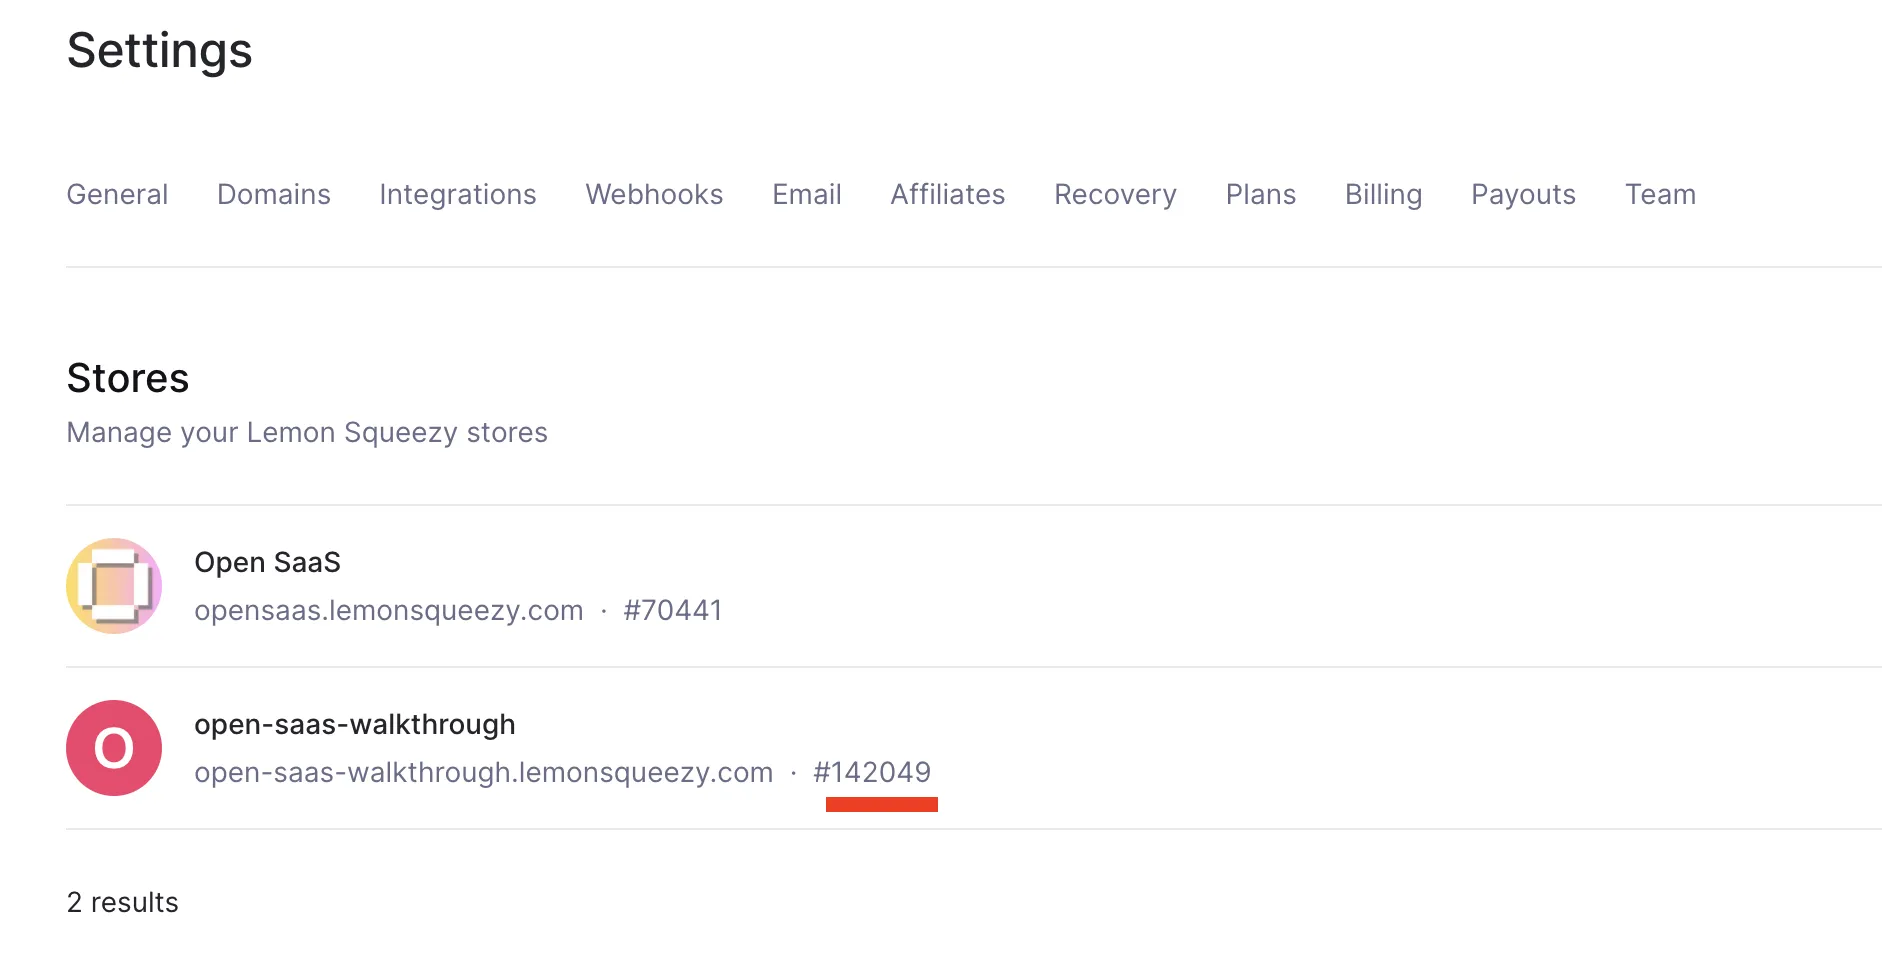
To get your store ID, go to the Lemon Squeezy Dashboard and copy the Store ID from the top right corner.
Copy and paste this number in your .env.server file under LEMONSQUEEZY_STORE_ID=
Create Test Products
To create a test product, go to the test products url https://app.lemonsqueezy.com/products.
- Click on the
+ New Productbutton and fill in the relevant information for your product. - Fill in the general information.
- For pricing, select the type of product you’d like to create, e.g.
Subscriptionfor a recurring monthly payment product orSingle Paymentfor credits-based product.
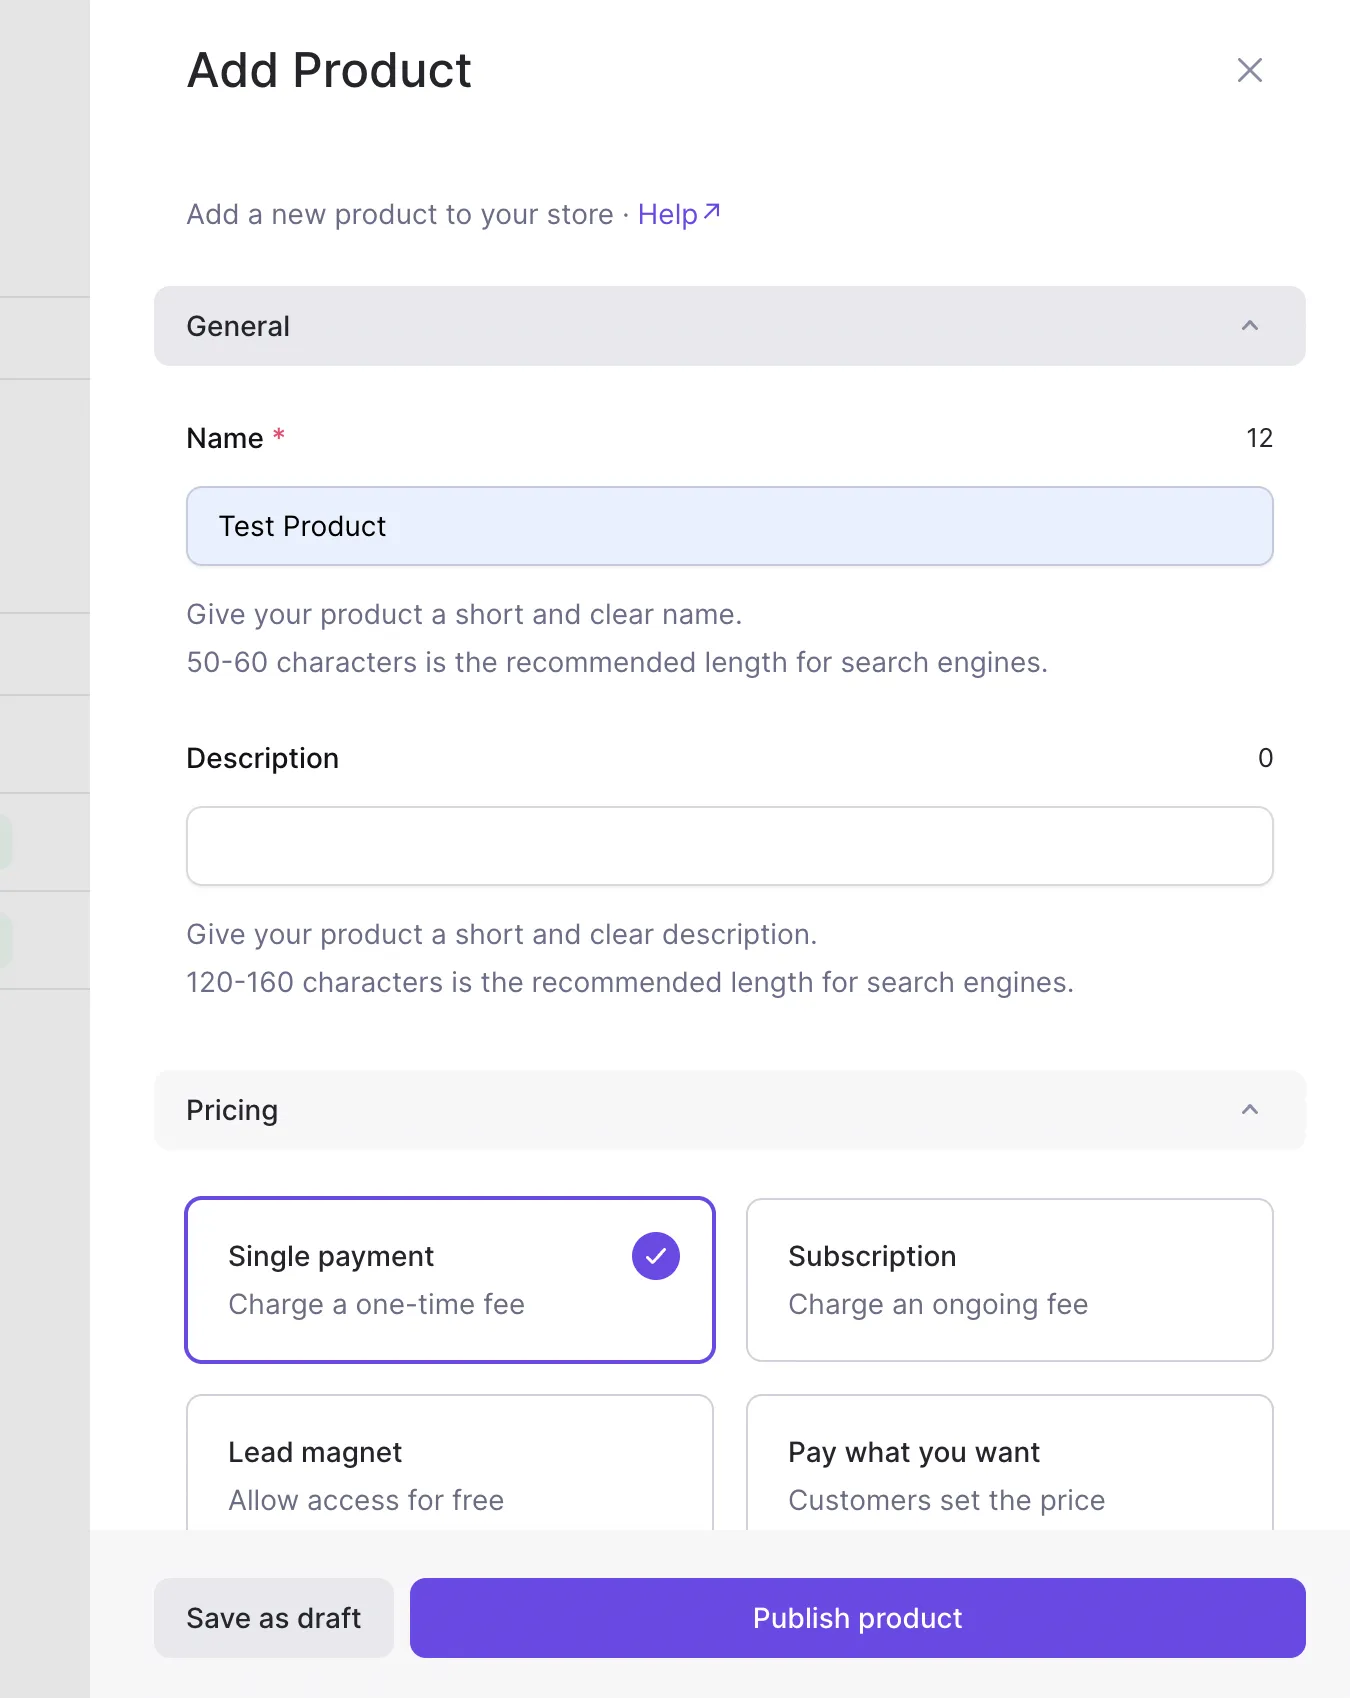
- Make sure you select
Software as a service (SaaS)as the Tax category type. - If you want to add different price tiers for
Subscriptionproducts, click onadd variantunder thevariantstab. Here you can input the name of the variant (e.g. “Hobby”, “Pro”), and that variant’s price.

- For a product with no variants, on the product page, click the
...menu button and selectCopy variant ID

- For a product with variants, on the product page, click on the product, go to the variants tab and select
Copy IDfor each variant.
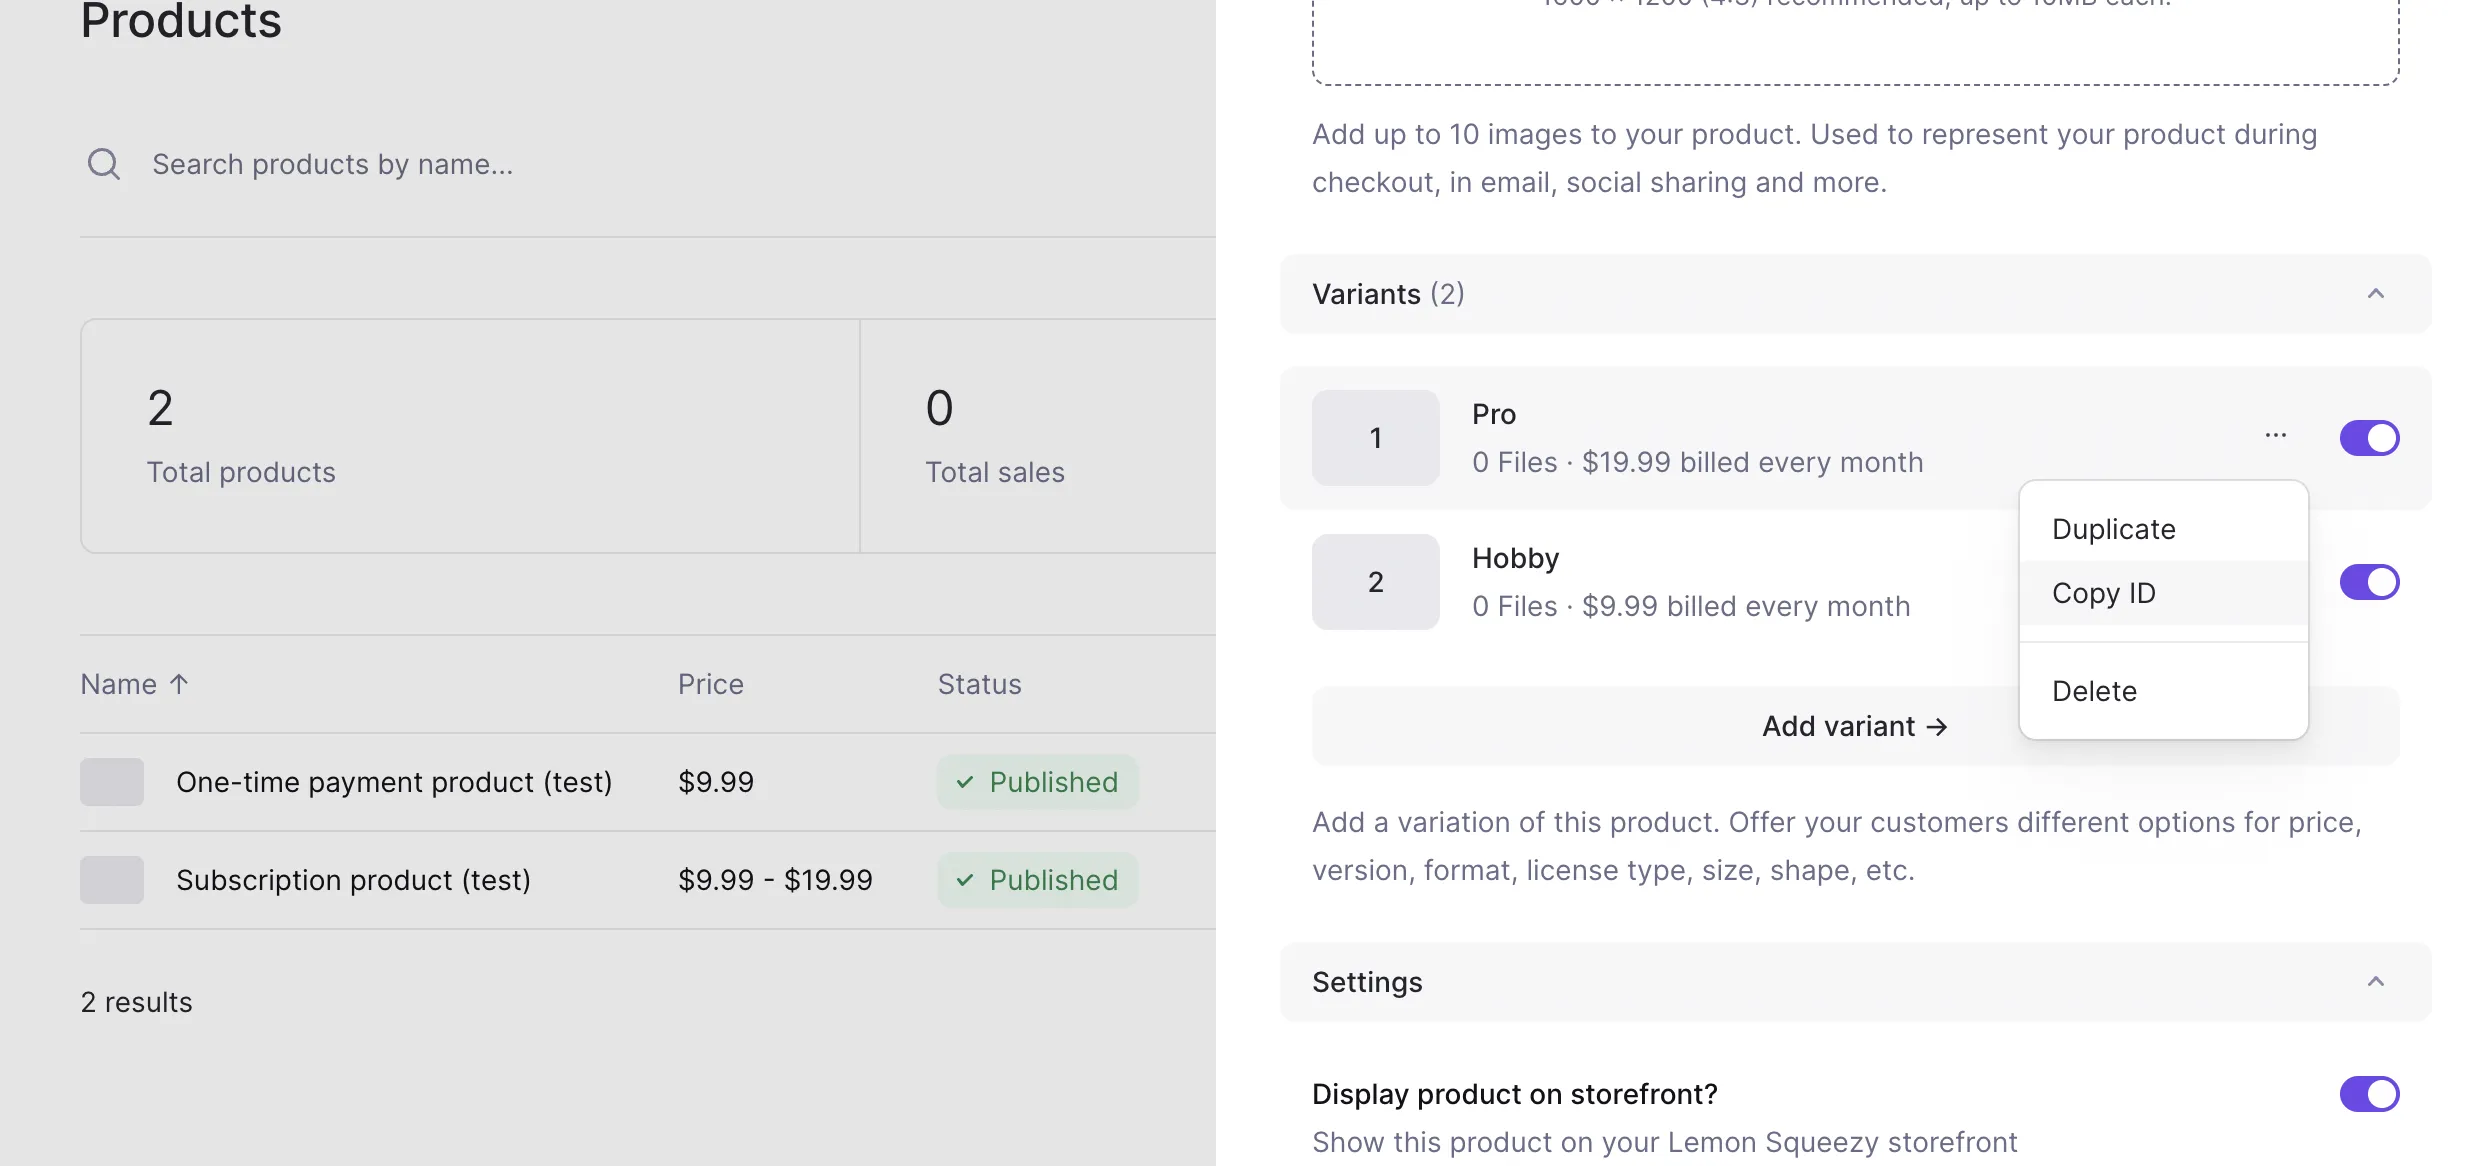
- Paste these IDs in the
.env.serverfile:- We’ve set you up with two example subscription product environment variables,
PAYMENTS_HOBBY_SUBSCRIPTION_PLAN_ID=andPAYMENTS_PRO_SUBSCRIPTION_PLAN_ID=. - As well as a one-time payment product/credits-based environment variable,
PAYMENTS_CREDITS__10_PLAN_ID=.
- We’ve set you up with two example subscription product environment variables,
- Note that if you change the names of the these environment variables, you’ll need to update your app code to match these names as well.
Create and Use the Lemon Squeezy Webhook in Local Development
Lemon Squeezy sends messages/updates to your Wasp app via its webhook, e.g. when a payment is successful. For that to work during development, we need to expose our locally running (via wasp start) Wasp app and make it available online, specifically the server part of it. Since the Wasp server runs on port 3001, you should run ngrok on port 3001, which will provide you with a public URL that you can use to configure Lemon Squeezy with.
To do this, first make sure you have installed ngrok.
Once installed, and with your wasp app running, run:
ngrok http 3001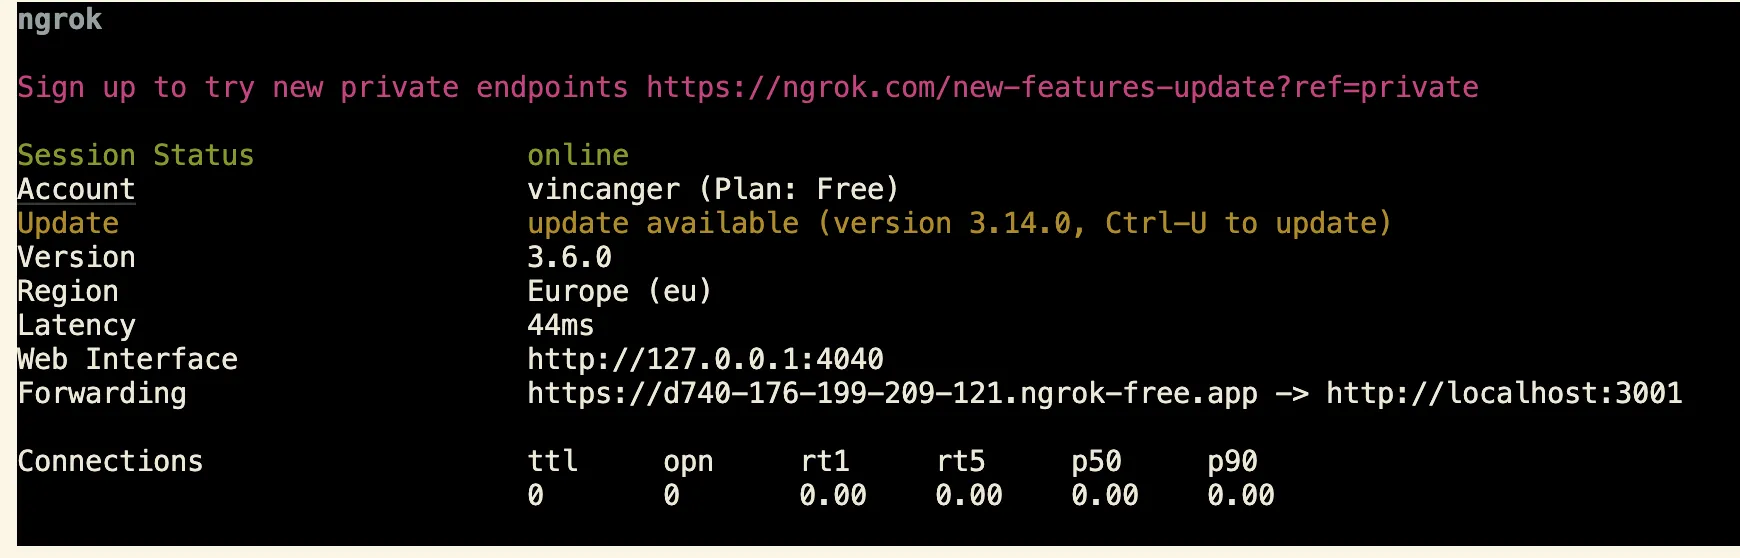
Ngrok will output a forwarding address for you. Copy and paste this address and add /payments-webhook to the end (this URL path has been configured for you already in main.wasp under the api paymentsWebhook definition). It should look something like this:
https://89e5-2003-c7-153c-72a5-f837.ngrok-free.app/payments-webhookNow go to your Lemon Squeezy Webhooks Dashboard:
- click the
+button. - add the newly created webhook forwarding url to the
Callback URLsection. - give your webhook a signing secret (a long, random string).
- copy and paste this same signing secret into your
.env.serverfile underLEMONSQUEEZY_WEBHOOK_SECRET= - make sure to select at least the following updates to be sent:
- order_created
- subscription_created
- subscription_updated
- subscription_cancelled
- click
save
You’re now ready to start consuming Lemon Squeezy webhook events in local development.
Deploying
Once you deploy your app, you can follow the same steps, just make sure that you are no longer in test mode within the Stripe or Lemon Squeezy Dashboards. After you’ve repeated the steps in live mode, add the new API keys and price/variant IDs to your environment variables in your deployed environment.