Stripe Integration
This guide will show you how to set up your Stripe account for testing and local development.
Once you deploy your app, you can follow the same steps, just make sure you’re using your live Stripe API keys and product IDs and you are no longer in test mode within the Stripe Dashboard.
To get started, you’ll need to create a Stripe account. You can do that here.
Get your test Stripe API Keys
Once you’ve created your account, you’ll need to get your test API keys. You can do that by navigating to https://dashboard.stripe.com/test/apikeys or by going to the Stripe Dashboard and clicking on the Developers.
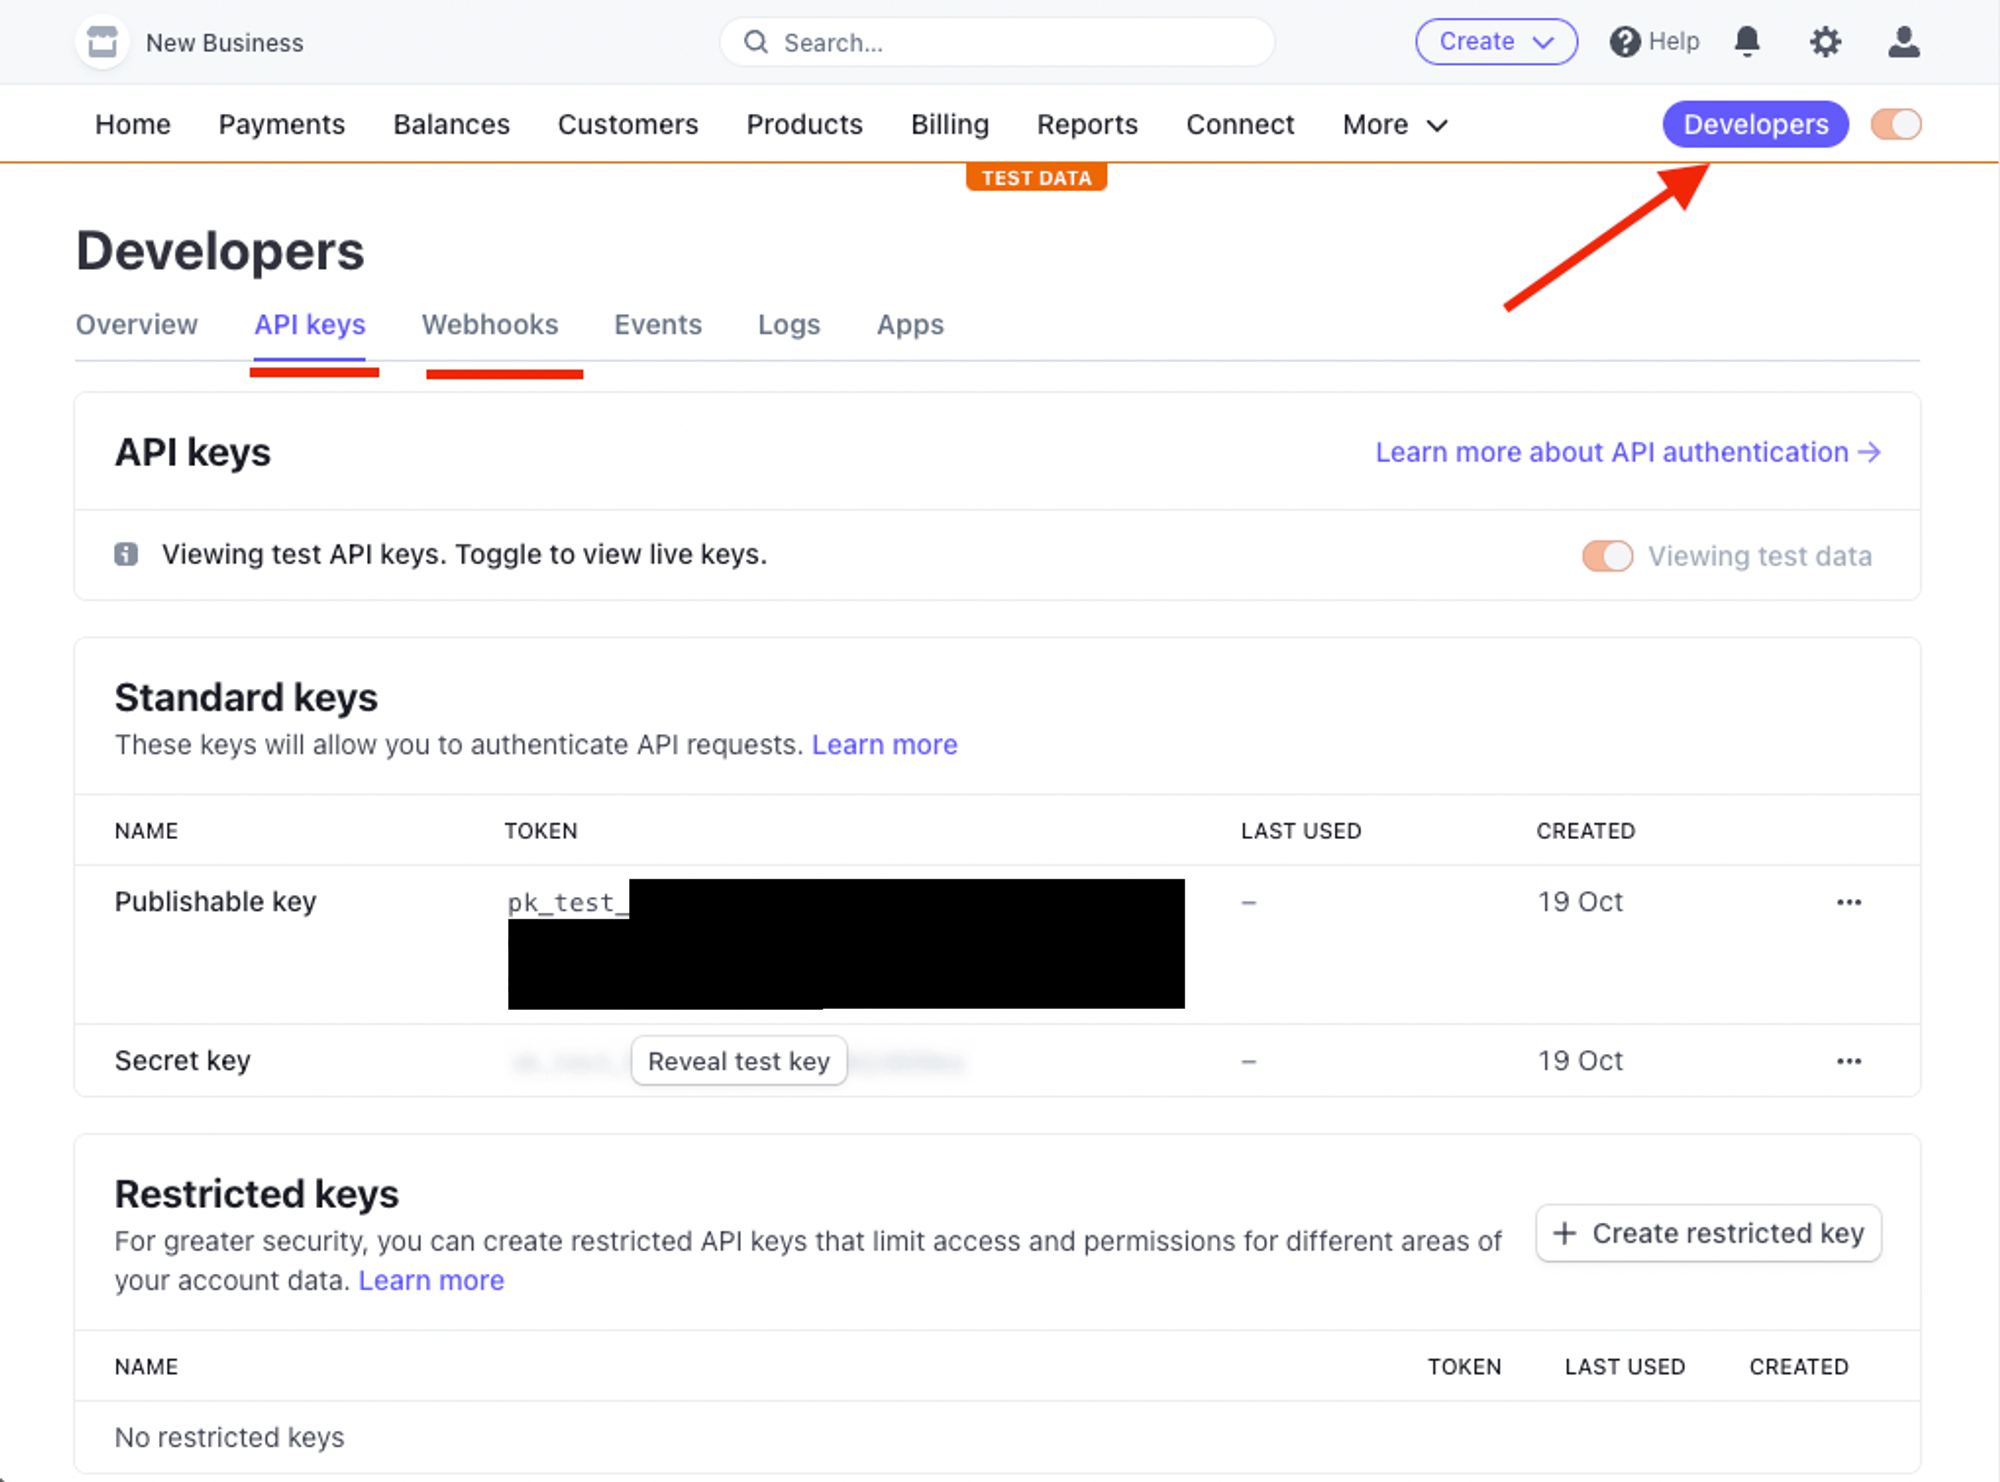
- Click on the
Reveal test key tokenbutton and copy theSecret key. - Paste it in your
.env.serverfile underSTRIPE_KEY=
Create Test Products
To create a test product, go to the test products url https://dashboard.stripe.com/test/products, or after navigating to your dashboard, click the test mode toggle.
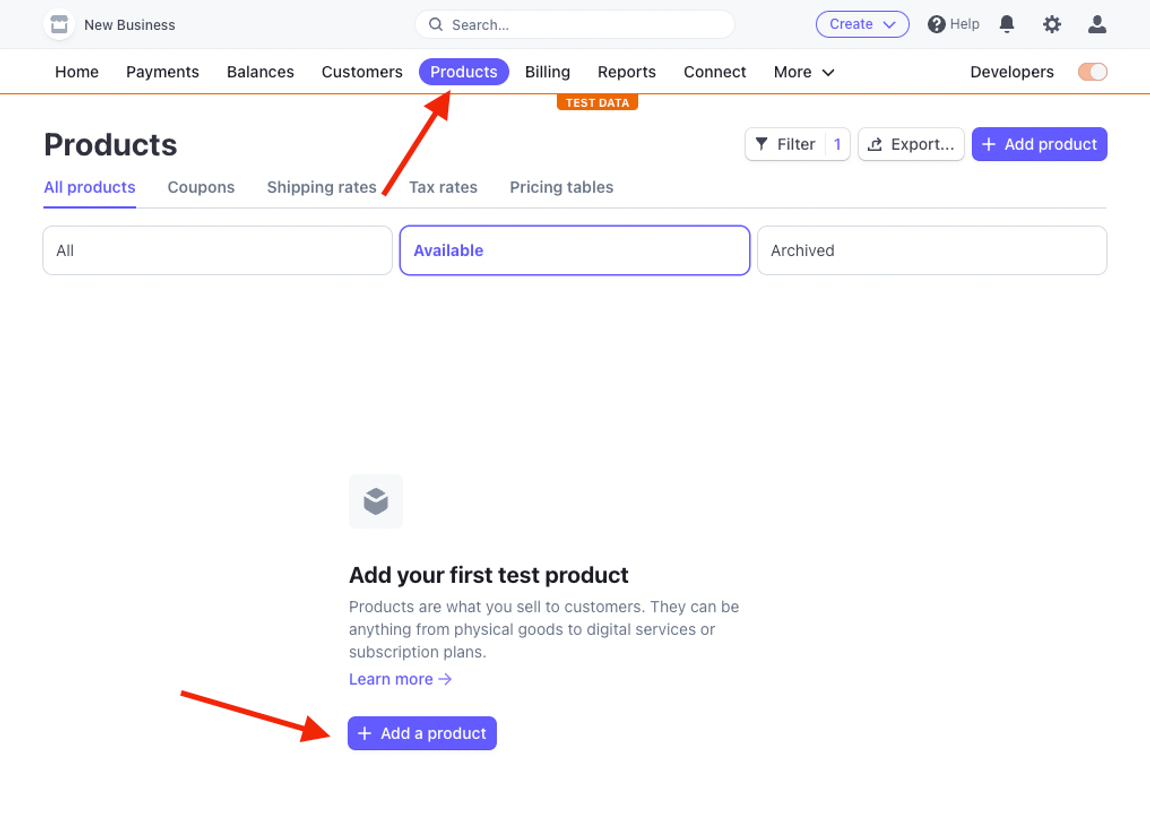
- Click on the
Add a productbutton and fill in the relevant information for your product. - Make sure you select
Software as a service (SaaS)as the product type. - For Subscription products, make sure you select
Recurringas the billing type. - For One-time payment products, make sure you select
One-timeas the billing type. - If you want to add different price tiers for the same product, click the
Add another pricebutton at the buttom.
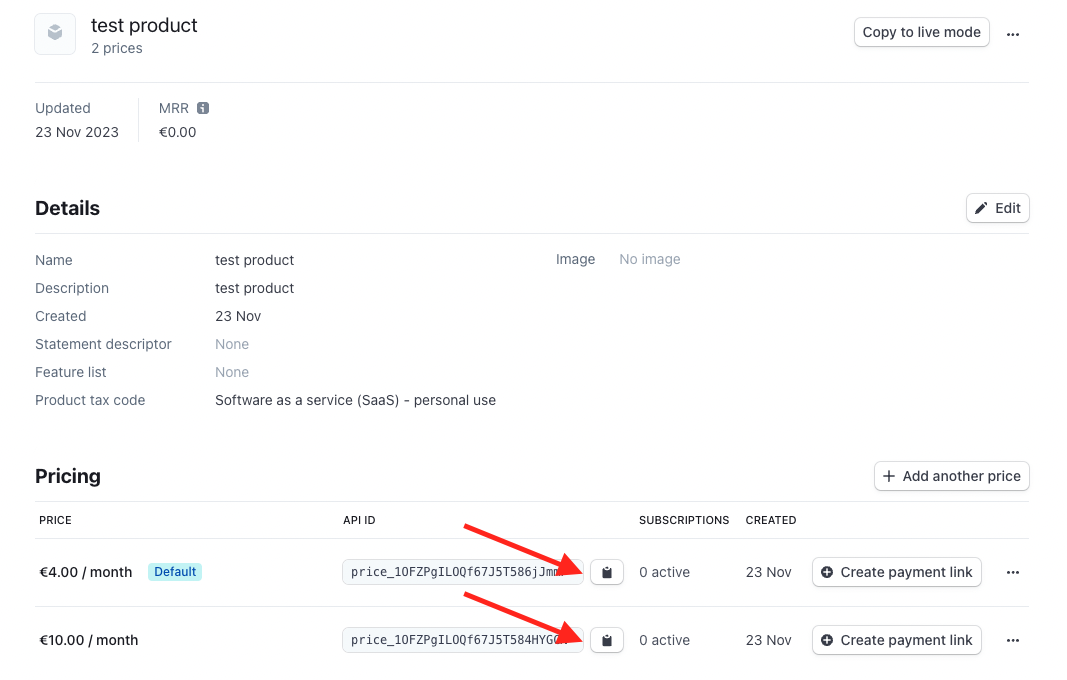
- After you save the product, you’ll be directed to the product page.
- Copy the price IDs and paste them in the
.env.serverfile- We’ve set you up with two example subscription product environment variables,
HOBBY_SUBSCRIPTION_PRICE_ID=andPRO_SUBSCRIPTION_PRICE_ID=. - As well as a one-time payment product/credits-based environment variable,
CREDITS_PRICE_ID=.
- We’ve set you up with two example subscription product environment variables,
- Note that if you change the names of the price IDs, you’ll need to update your server code to match these names as well
Create a Test Customer
To create a test customer, go to the test customers url https://dashboard.stripe.com/test/customers.
- Click on the
Add a customerbutton and fill in the relevant information for your test customer.
Get your Customer Portal Link
Go to https://dashboard.stripe.com/test/settings/billing/portal in the Stripe Dashboard and activate and copy the Customer portal link. Paste it in your .env.client file:
REACT_APP_STRIPE_CUSTOMER_PORTAL=<your-test-customer-portal-link>Your Stripe customer portal link is imported into src/client/app/AccountPage.tsx and used to redirect users to the Stripe customer portal when they click the Manage Subscription button.
function CustomerPortalButton() { const handleClick = () => { try { const schema = z.string().url(); const customerPortalUrl = schema.parse(import.meta.env.REACT_APP_STRIPE_CUSTOMER_PORTAL); window.open(customerPortalUrl, '_blank'); } catch (err) { console.error(err) } };Install the Stripe CLI
To install the Stripe CLI with homebrew, run the following command in your terminal:
brew install stripe/stripe-cli/stripeor for other install scripts or OSes, follow the instructions here.
Now, let’s start the webhook server and get our webhook signing secret.
stripe listen --forward-to localhost:3001/stripe-webhookYou should see a message like this:
> Ready! You are using Stripe API Version [2023-08-16]. Your webhook signing secret is whsec_8a... (^C to quit)copy this secret to your .env.server file under STRIPE_WEBHOOK_SECRET=.